|
Vendor/Client Gateway: Manage Main Menu
Contract Insight allows authorized and licensed users with Administrative permissions to customize the top navigation menu to display icons as well as alter the menu names, accessibility, and location of the menus.
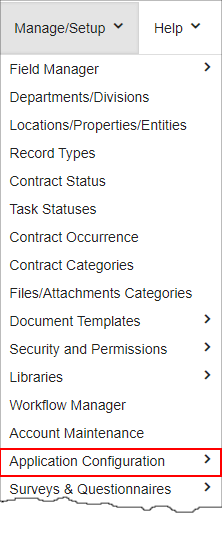
To customize the menus of the top navigation menu of the Gateway, go to Manage/Setup - Application Configuration - Manage Main Menu.
The Configuration Wizard: Manage Main Menu screen displays. From the drop-down menu, select Vendor/Client Gateway.
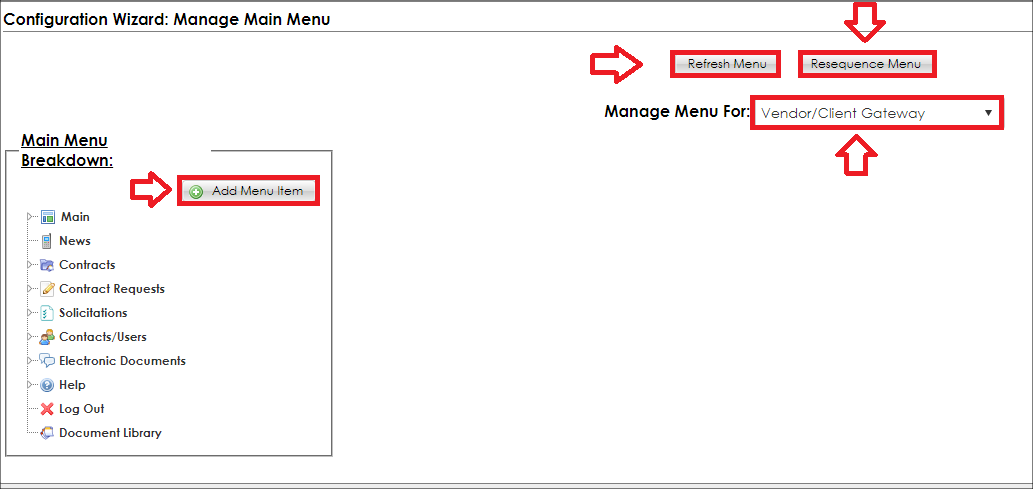
There are four main sections of the screen.
1. Main Menu Breakdown
- Select the arrows to the left of the menu title to display a list of sub-menus that are contained in that menu.
- Select the menu or sub-menu name to show the menu item’s details in the Manage Menu Item Info section of the screen.
- Add new menu items by clicking Add Menu Item.
2. Manage Menu Item Info
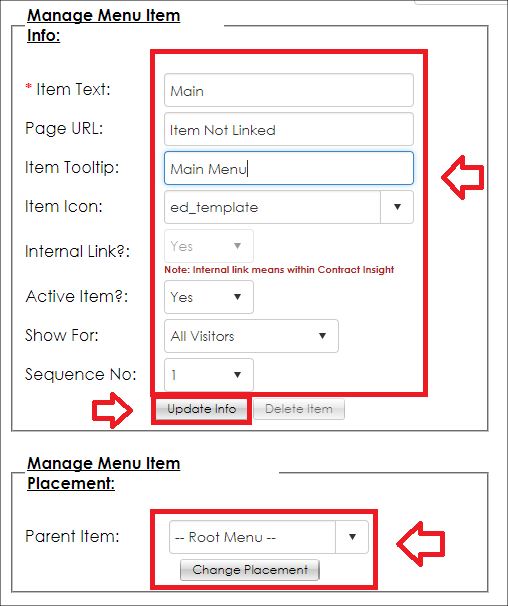
Item Text: The menu’s name as it will appear in the navigation menu.
Page URL: Where the page is located (if this is a system page, the ‘Page URL’ is not customizable).
Item Tooltip: The Item Tooltip pop-up displays the description of the menu item.
Item Icon: Select an icon to be displayed to the left of the menu name in the navigation menu (optional).
Active Item?: Determines whether the menu item appears in the menu.
Show For: This Determines whether the menu item displays for All Visitors or Logged In Visitors.
Sequence No.: The order in which the menus appear in each grouping.
Once you have made any/all changes, click Update Info to save all changes made.
3. Manage Menu Item Placement
Parent Item: Shows the menu item directly above the selected item in the main menu hierarchy (i.e. My Dashboards is contained in the Home main menu item).
All menu items can have their parent item customized/changed to any other menu item in the main menu hierarchy by selecting the name in the drop-down box and clicking Change Placement.
When a menu item has its parent item modified, its sequence number is automatically updated to the last number in the sequence list for the new parent item.
4. Upload New Icon
This area allows users to upload personalized icons to be selected in the Item Icon drop-down in the Manage Menu Item Info section of the page. (see the Image Library Wiki page for more information)
Note: Uploaded icons should be 16 pixels x 16 pixels (the default size of icons).
5. Refresh Menu/Re-sequence Menu
Once any changes have been made to the menu, be sure to click Refresh Menu at the top of the Manage Main Menu screen.
To re-sequence the order in which the menus display, click Re-sequence Menu at the top of the Manage Main Menu screen.
|