|
Ad-Hoc Report Wizard: Tables
When creating a new Ad-Hoc Report, the first key component that is necessary is to specify the primary table/area that the ad-hoc report is using.
Primary Table
1. When creating a new report, the Ad-Hoc Report Manager: Tables screen displays immediately after clicking Save & Continue on the Overview page. If editing an existing report, click Tables on the side menu.
2. Select the Primary Table for the report from the pick-list that will be involved in the report.
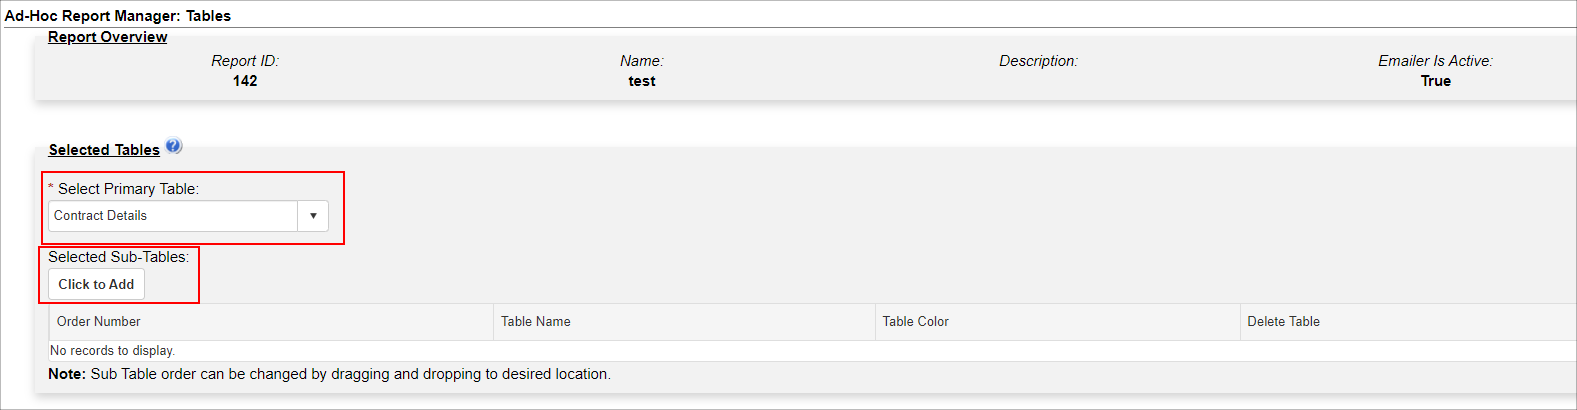
Additional Sub/Linked Tables
1. To add any of the additional related/sub/linked tables to the ad-hoc report, click Click to Add.
2. The Add Ad-Hoc Sub Table pop-up window displays. Open the pick-list, select the desired table, and click Add Sub Table.
3. Repeat Selection of additional tables as necessary.
4. For each sub/linked table, optionally, click Choose to select a colour for the rows with the table's data on the run report.

5. To remove a sub/linked table, click the red X icon ( ). ).
Once the all of the desired tables have been selected, click Continue to Field Selection at the bottom of the page to save all the information and move on to the next in the Ad-Hoc Report Wizard, Field Selection. If editing an existing report, click Field Selection on the side menu to navigate to that screen.
|