|
Advanced/User-Defined Permission Management
Advanced Permissions allows for the creation of custom permissions that can be assigned to security groups or to individual employees. Advanced permissions management is only accessible by system administrators for defining the various permissions. Any permissions created through the advanced permission management can be assigned directly to employee records and/or to security groups in the same way that out-of-the-box permissions are assigned.
Creating a User-Defined Permission
1. Navigate to Manage/Setup - Manage User Permissions. A list of all Permissions displays.
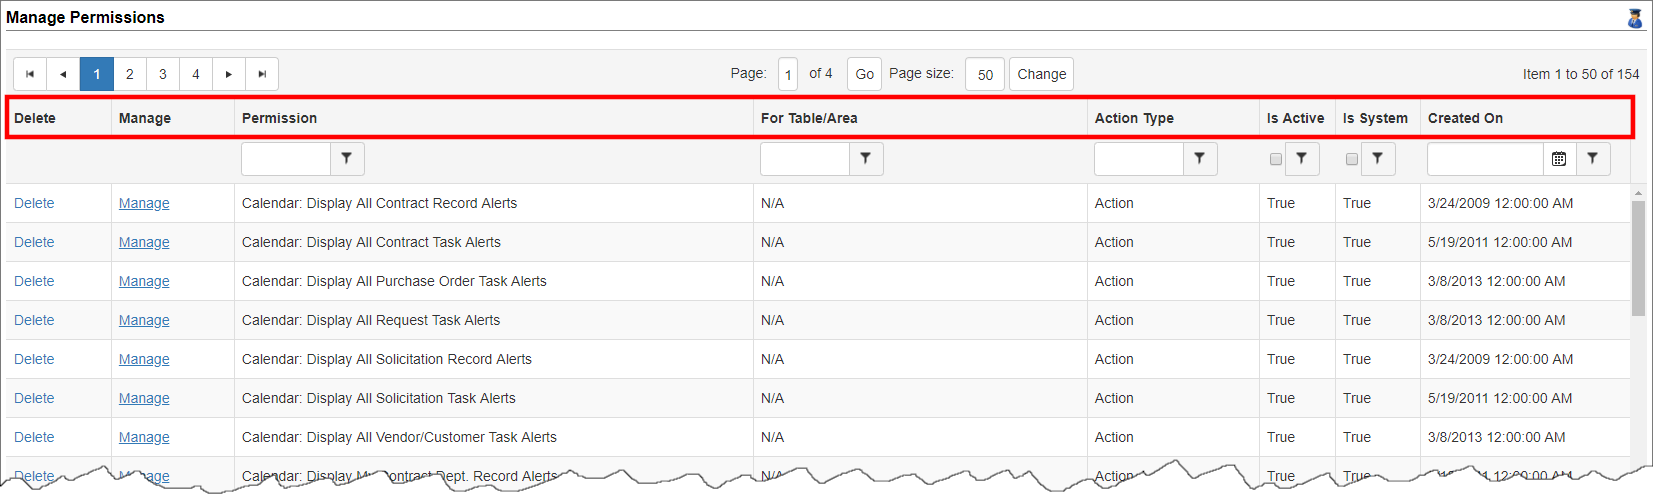
On the Manage Permissions screen, options to Delete (only custom-configured permissions) and Manage are available. Also displayed are the Permission Name, the Table/Area to which the permission applies, the Action Type, if the permission is Active, if it is a System permission, and the date on which the permission was Created. To assist with location of a permission, any of those displayed items can be used for filtering.
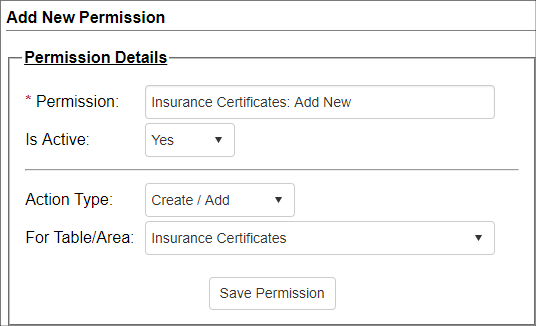
2. Click Create New Permission on the Side Menu to begin setting up a new custom permission.
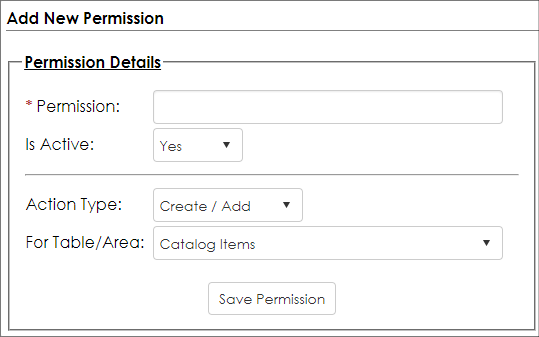
2. Provide a name for the Permission. Establishing a naming convention is important to help keeping track of permissions created, having a brief description, and locating them for use.
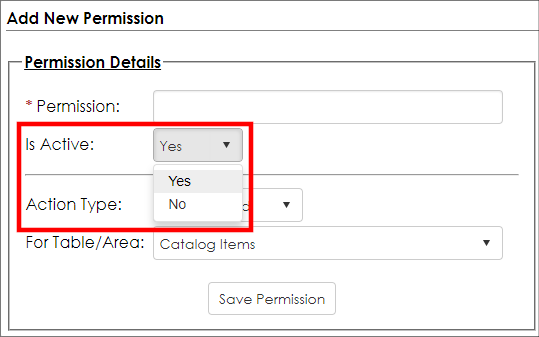
3. Set Active to True to enable to use of the permission.
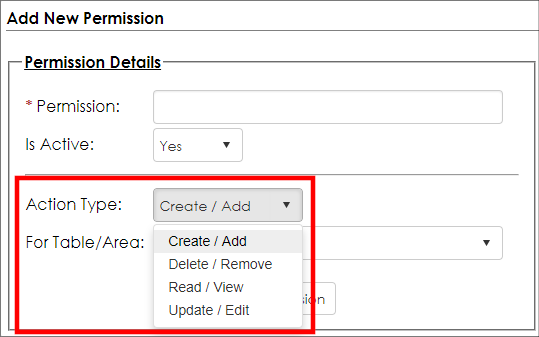
4. Select an Action Type from the choices of Create / Add, Delete / Remove, Read / View, and Update / Edit.
5. Select the Table/Area to which the Permission applies.
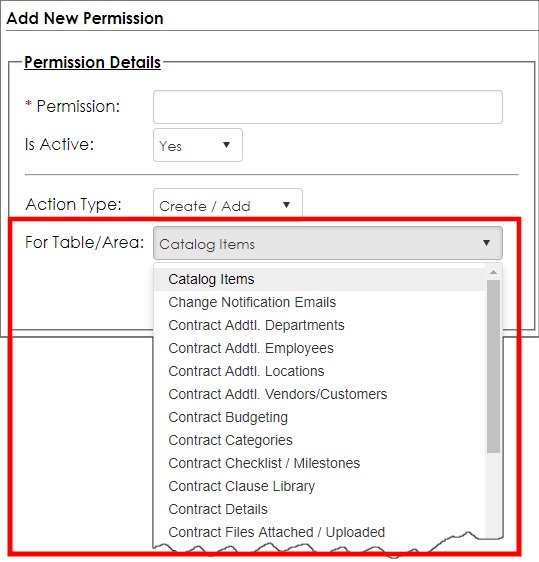
For example, we could create a permission to allow some users to view records of a certain type.
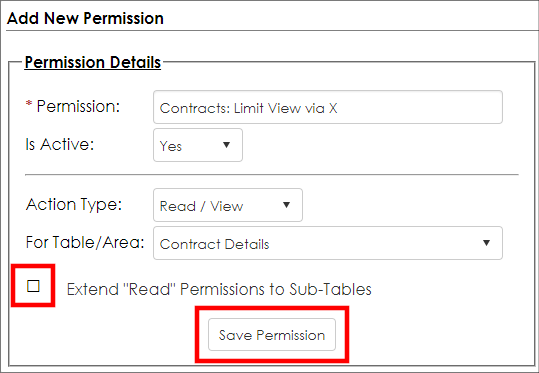
6. To extend the permission being created to a sub-table, mark the Extend X Permissions to Sub-Table (where x is the action type).
7. Click Save Permission.
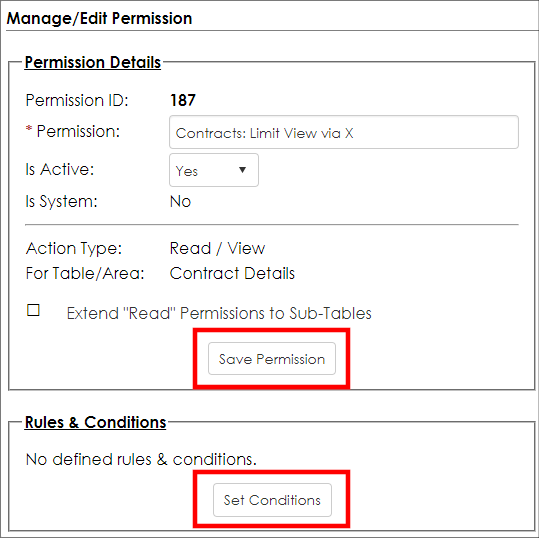
8. The screen refreshes and the Rules & Conditions area appears. If making changes to the Permission Details, click Save Permission when done.
Setting Rules & Conditions
Rules and Conditions can be established for user-defined permissions to limit when they apply.
1. Click Set Conditions.
2. The Manage Permission’s Rules and Conditions pop-up window displays. Like many other areas of the system, a Filters & Conditions area displays. This area has a few options:
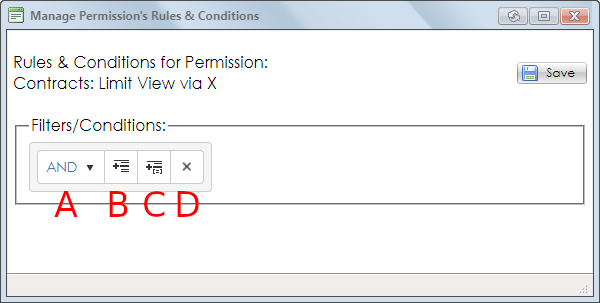
A. Logical Switch: Select And or Or to define the condition group’s function.
B. Add Expression: Click the Add Expression icon to add a single new logical expression for the selected Expression Group.
C. Add Expression Group: Click the Add Expression Group icon to add a new Expression Group with its own Logical Switch.
D. Delete Expression or Expression Group: Click the X icon to remove the individual Expression or Expression Group.
3. If setting rules, each Expression Group must contain at least one Expression. Click the Add Expression icon.
4. Select the table and field for the rule.
5. Select the logical expression for evaluation.
6. Enter the string for the logical expression’s evaluation.
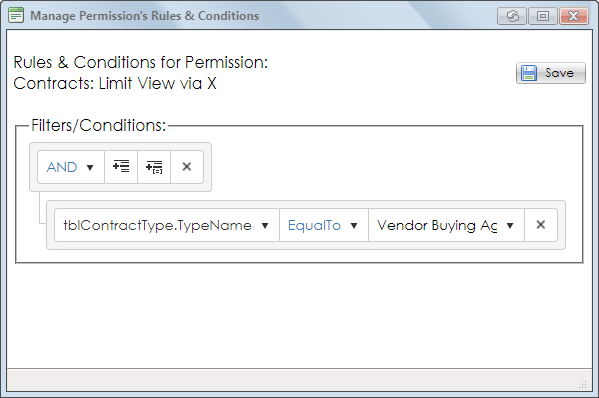
In the example above, we set the table and field to tblContractType.TypeName, the logical expression to EqualTo and the evaluation criteria to the specific type name, Vendor Buying Agreement to provide read access to specific individuals or security groups for the contracts of the Vendor Buying Agreement type.
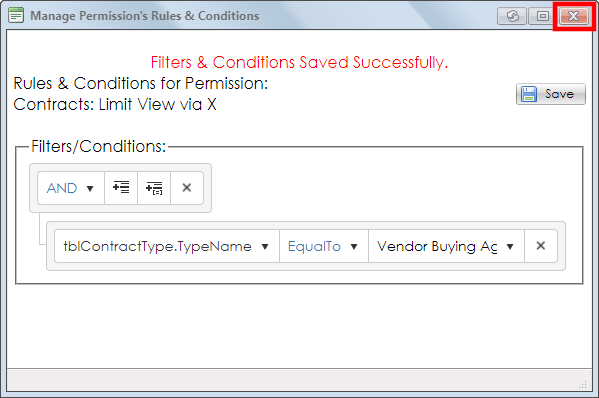
7. Click Save to save the rule/condition.
8. A message stating Filters & Conditions Saved Successfully displays. Click the X in the corner to close the pop-up window.
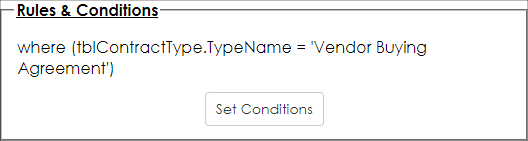
9. When returning to the Manage Permissions screen, the rule/condition(s) display.
Applying the User-Defined Permission
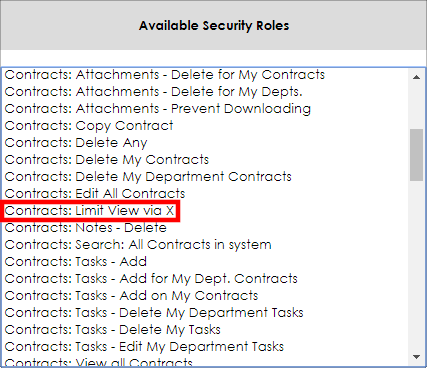
1. Navigate to the desired security group or individual employee permission list.
2. Find and select the user-defined permission. Permission display in alphabetical order, so keeping a consistent naming convention is important.
3. Click the left-facing arrow to add the permission to those assigned.
Notes:
1. User-defined permissions can be created for sub-tables. If not extending permissions to a sub-table, such may be necessary for some users.
2. Best practice dictates testing of all user-defined permissions to ensure desired functionality before applying them to users.
3. Use extreme caution if building and applying user-defined permissions! Conflicts and undesired results may occur due to missing permissions or conflicting rules. CobbleStone recommends working with a CobbleStone Implementation Specialist before creating and applying such permissions for the first time.
|