|
Application Configuration: Config Settings
Configuration Group: POP3 E-Mail Drop Box
E-mail Inbox Monitoring [Formerly: E-mail Drop Box]
The E-mail Inbox Monitoring tool helps monitor a dedicated email inbox using POP e-mail protocol, uses logic to identify emails based on the subject-line text, and imports the email and attachments to Contract Insight.
E-mail Inbox Monitoring Requirements
E-mail Inbox Monitoring requires several items which may need to be supplied by your organization’s IT department:
- Contract Insight Enterprise Software License;
- Dedicated POP 3 E-mail box that is accessible by the Contract Insight Software application;
- POP 3 Server Name – provided by your IT Team or E-mail Provider;
- The POP 3 credentials;
- POP 3 User Name – provided by your IT Team or E-mail Provider;
- POP 3 E-mail Address – provided by your IT Team or E-mail Provider;
- POP 3 Password – provided by your IT Team or E-mail Provider;
- POP 3 Port – provided by your IT Team or E-mail Provider; typically, PORT 110;
- System Administrator access to Contract Insight Enterprise
E-mail Inbox Monitoring Configuration
E-mail Inbox Monitoring can be configured by going to Setup -> Application Configuration -> Config Settings within Contract Insight.
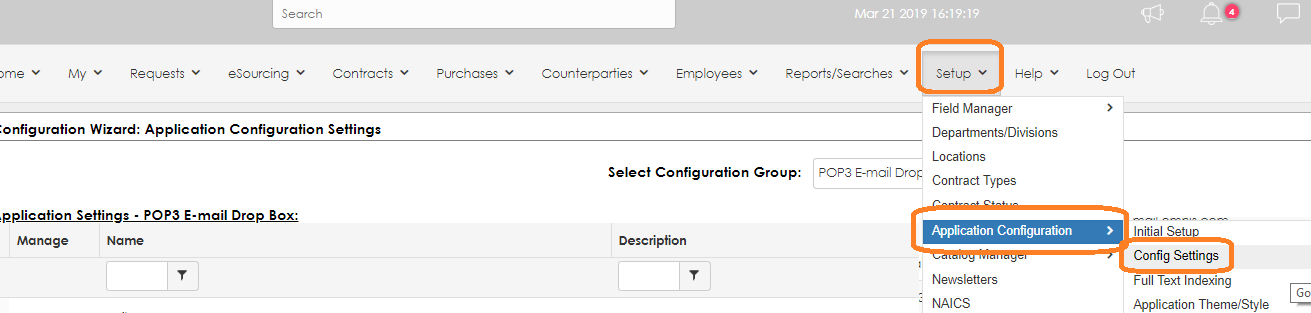 
Once the Config Settings page loads, select the POP3 E-Mail Drop Box item from the Configuration Group:
 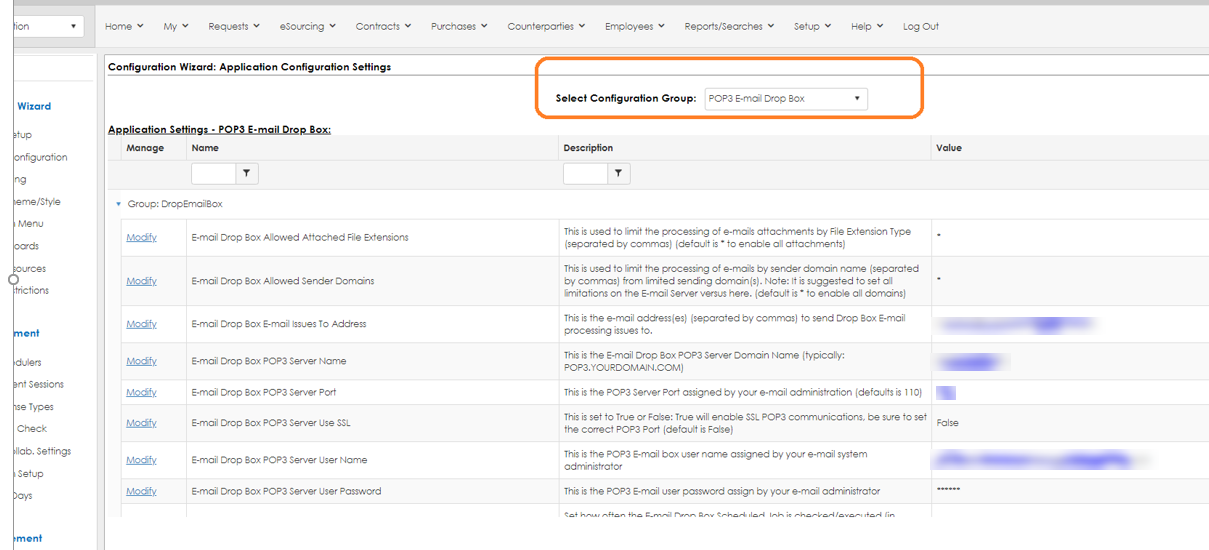
Proceed with configuring the POP3 E-mail settings using the following information (provided by your IT Team or E-mail Provider):
 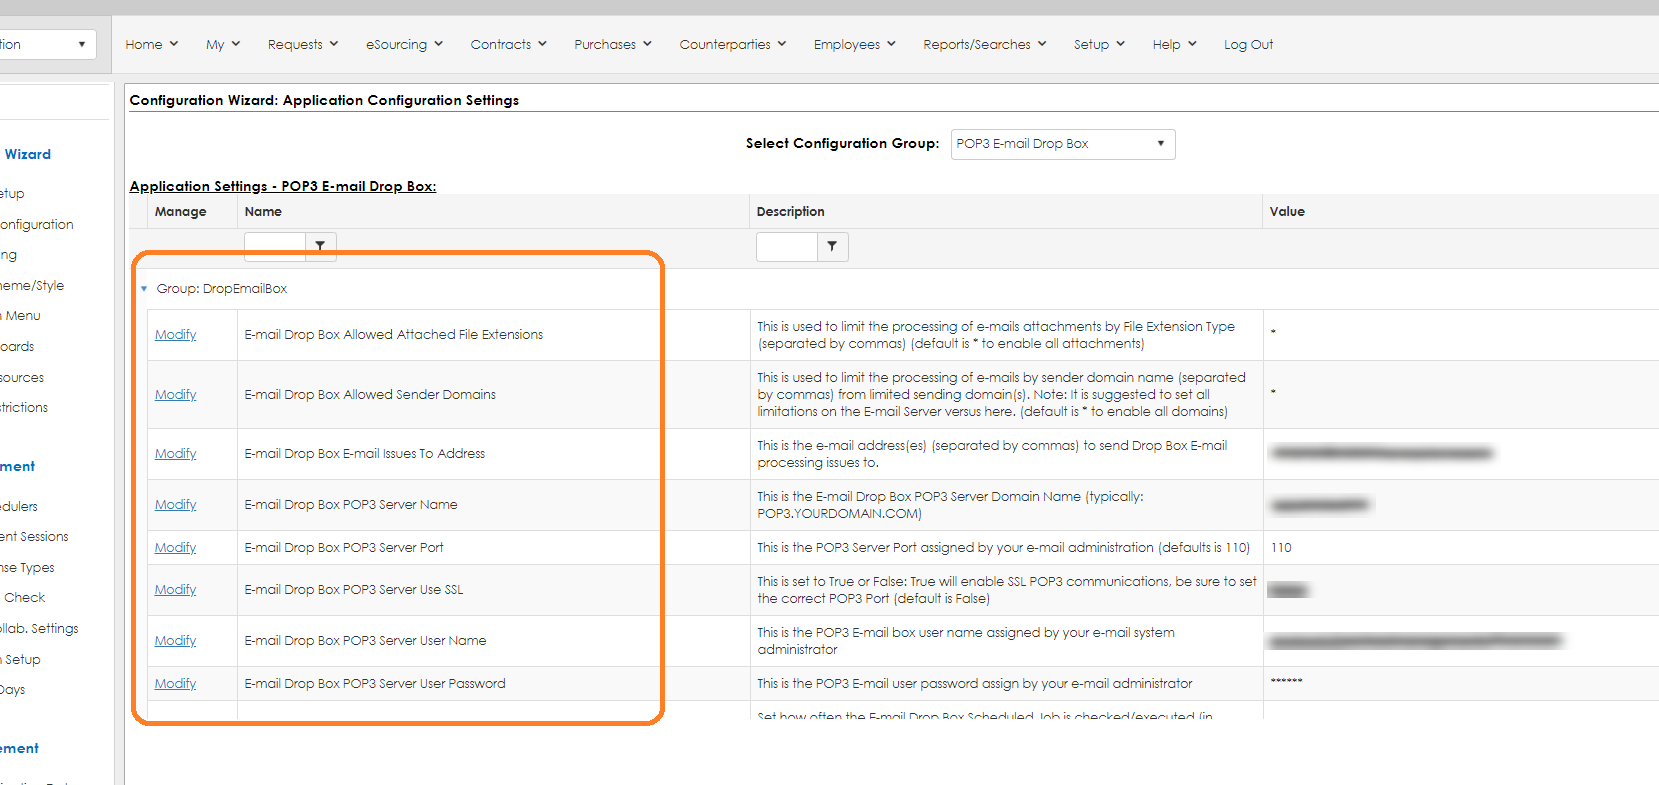
- POP 3 Server Name – provided by your IT Team or E-mail Provider;
- The POP 3 credentials;
- POP 3 User Name – provided by your IT Team or E-mail Provider;
- POP 3 E-mail Address – provided by your IT Team or E-mail Provider;
- POP 3 Password – provided by your IT Team or E-mail Provider;
- POP 3 Port – provided by your IT Team or E-mail Provider; typically, PORT 110;
- Set the Scheduler in minutes: typically, 30 minutes is good.
 
The e-mail import job runs on a schedule as defined in the configuration settings and checks ‘un-read’ e-mail messages in the POP3 e-mail box.
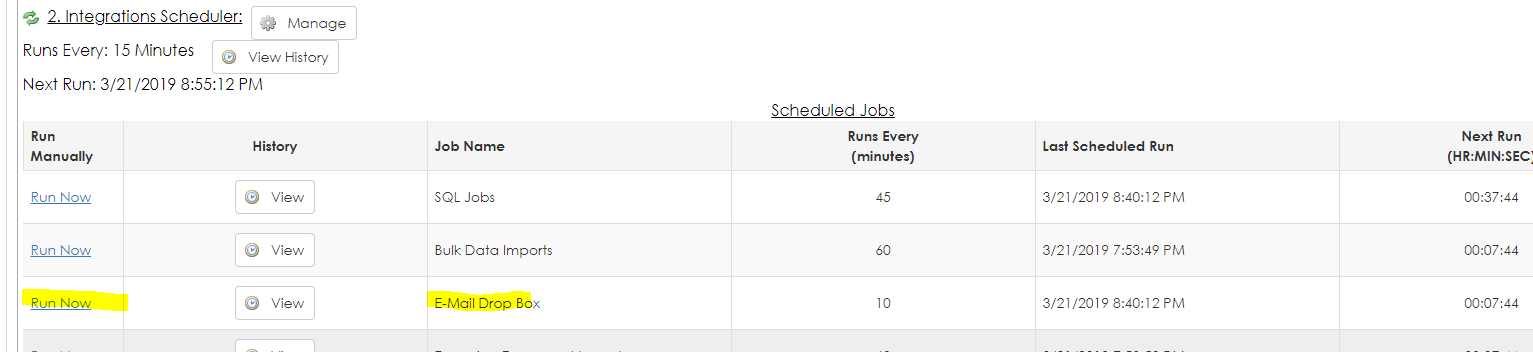
NOTE: If needed, a System Admin may manually run the E-mail Drop Box Scheduler Timer job via the Manage Schedulers screen which can be accesses from side menu of the Application Configuration -> Config Setting page.
Ensure the POP3 e-mail account is monitored by a legal professional for any e-mail messages that do not make it into the system. It may also be beneficial to have an e-mail rule that automatically forwards the e-mail to an alternate e-mail address to be read and reviewed by a legal professional.
NOTE: Be aware that, if an e-mail is read via the POP3 account, the e-mail import job may not import that specific e-mail message or attachment.
Using E-mail Inbox Monitoring
Existing Contract Insight Records
Once the POP3 e-mail box is configured and tested, a user may send e-mails with attachments from Contract, Vendor/Customer, Employees, Request, Solicitations, and Purchase Order records based on the record ID.
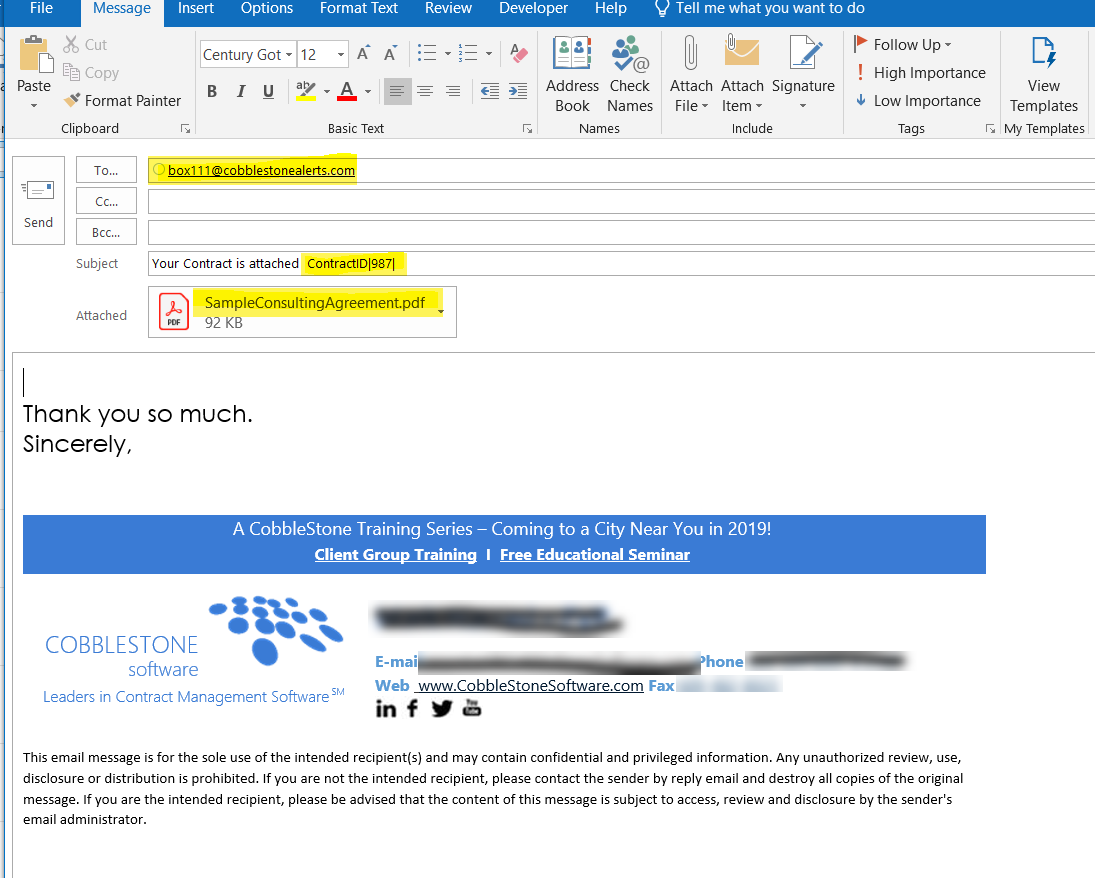
For example, sending an e-mail to the configured POP3 account with the following text in the subject will attach the e-mail and files to its record: ContractID|345|
Note that we have the text ContractID then a pipe character followed by the Contract record ID number followed by a pipe character with no spaces.
To send an e-mail to a Vendor record with the Vendor ID of 654, we would use VendorID|654| in the subject line. You may add additional text in the subject line.
Below is an example e-mail to the box111@cobblestonealerts.com. If configured correctly, the email will be imported and the attached PDF will be attached to Contract Record ID 987. In addition, it will add a task alert to the Contract Record’s primary assigned employee to alert the employee there is a new file attached to the record.
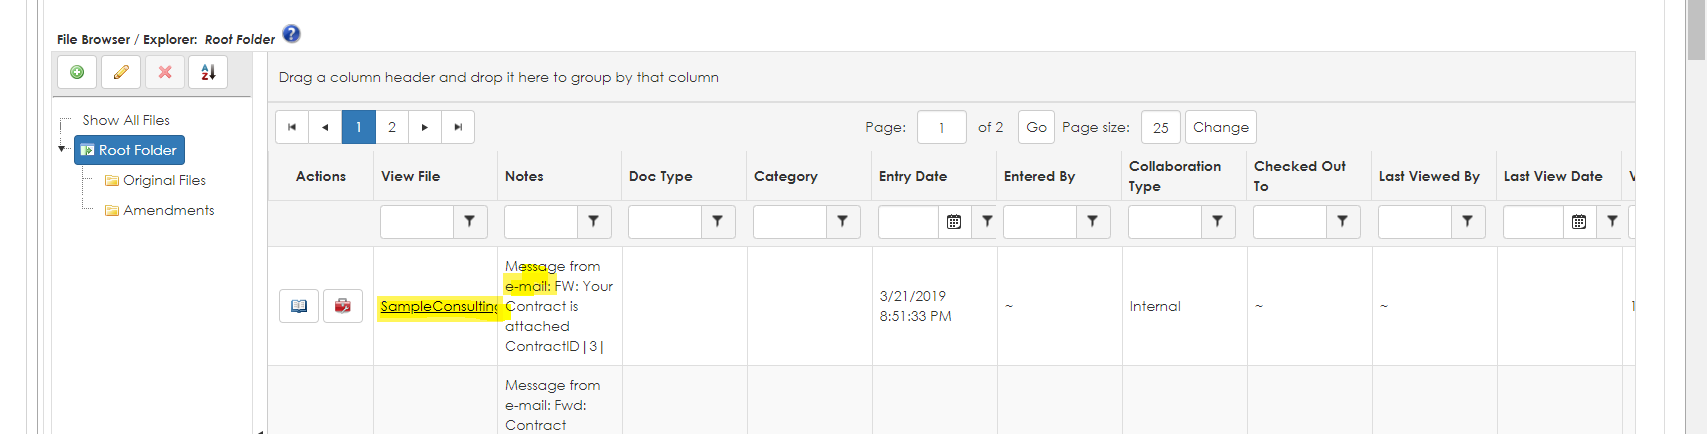
After the e-mailer job runs, the file is attached to the Contract record as seen below:
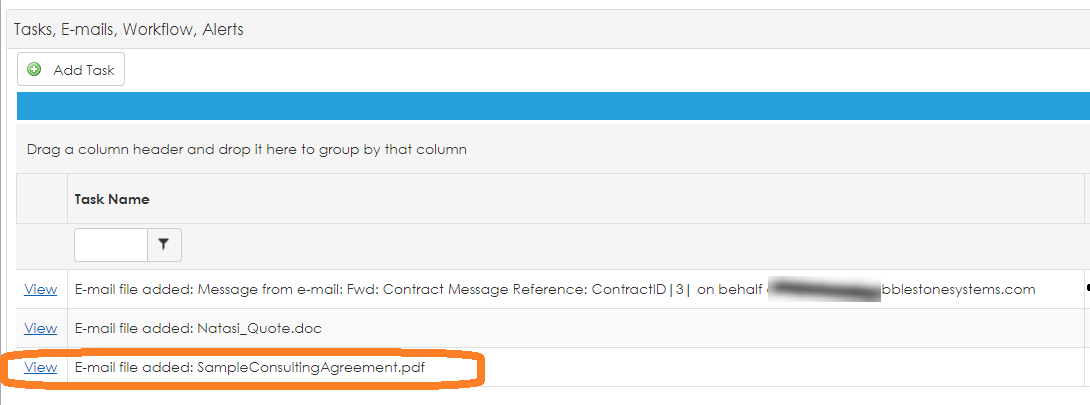
A task is also added to the Contract record to alert the employee a new file was added.
NOTE: The task can be set to auto-complete in the POP3 E-mail Drop Box settings discussed in the E-mail Inbox Monitoring Configuration section above.
The first part of the e-mail message is added to the Contract record's notes section.
 
Create New Record From E-mail
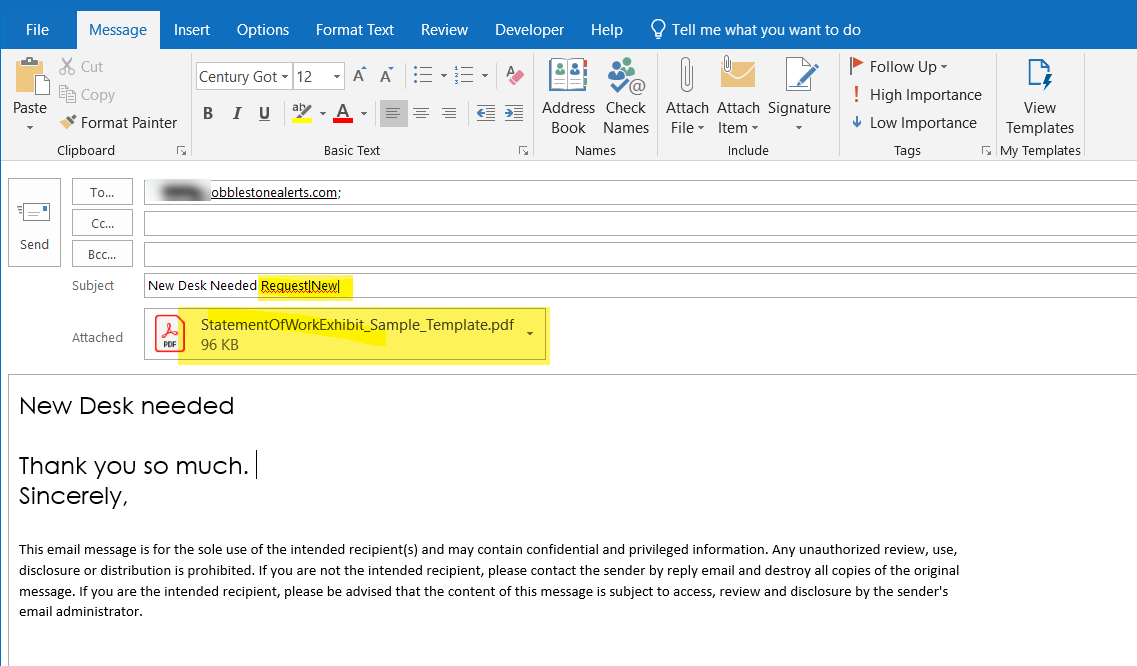
It is possible to create a new record in Contract Insight from an email by using RecordType|new| in the Subject line. For example, to have the E-mail Inbox Monitoring tool create a new Request/Requisition Record and attach a file in Contract Insight, use the text Request|new| in the Subject line of the email.
NOTE: Be cautious using this feature as any subsequent email sent to the e-mail box will create new records if “new” isn’t replaced by the RecordID. It may be beneficial to lock the e-mail address down to just internal employees as advised by your IT department.
In the example below we are sending an email to create a new Request/Requisition Record for acquiring a new desk.
Learn more about the Email Inbox Monitoring tool by contacting your Cobblestone Software Account Representative.
|