|
Manage Document Package Template: Managing Layout (sub-tables)
The Manage Layout(s) screen allows users to specify the layout of fields for the sub table grid/table to be displayed on the document.
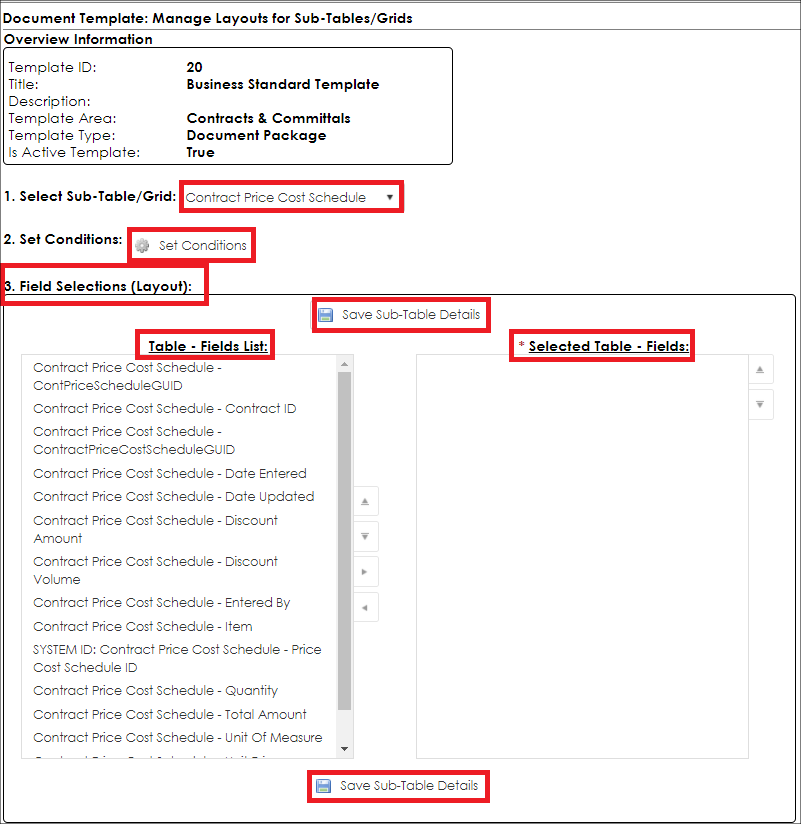
This screen has three major components:
1. Drop Down Sub Table Selection: The drop-down list of Sub-Tables/Grids
2. Table-Fields List: The List of all fields associated with the table selected from the drop-down list
3. Selected Table-Fields: The list of fields selected to be used on this sub table.
Drop Down Sub Table Selection
This drop-down list populates the two list boxes based on the sub table selected.
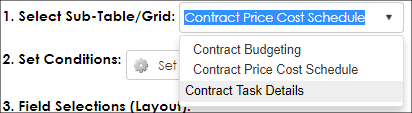
Table-Fields List (Available to be Selected)
This list shows all the remaining fields associated with the sub table selected that can be selected or used.
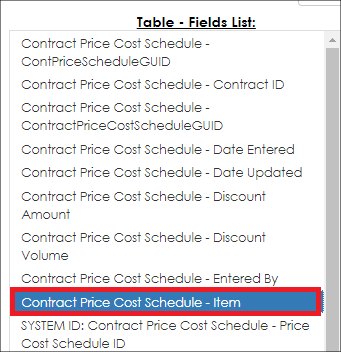
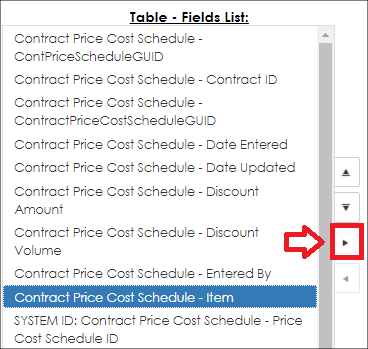
To select a field for use in the template, click the field’s name (it will highlight in blue) and either drag it to the Selected Table-Fields list or click the right arrow (pointing towards the Selected Table-Fields list).
Selected Table-Fields
This list shows the assigned fields for the sub table. To begin managing a field from this list, click the field (it will highlight in blue).
.PNG)
The selected field can now be managed, re-ordered, or removed from the list.
- Reordering: To re-order the fields either click and drag the field to the position desired, or click the up and down arrows to the right of the list.
Note: The order of fields from top to bottom corresponds to the layout of the fields (from left to right) in the grid when the content is merged.
- Removing: To remove a field once it has been selected, click on the arrow pointing to the left in between the two lists.
Note: This will remove the field from the list of selected and place it back in the list of available fields (the left list).
- Managing: Once a field has been selected, it can be managed. Managing a field consists of two components, the Display Name and Auto Totaling.
- Display Name: This is the text that will appear at the top of this column in the table when it is merged onto a document.
Note: This text initially defaults to the Display Name of the Field.
- Auto Totaling: This check box denotes if the column should be auto totaled and have this total placed at the bottom of this column in the table when it is merged onto a document.
Note: This check box is only available for integer, decimal and currency field types.
|