|
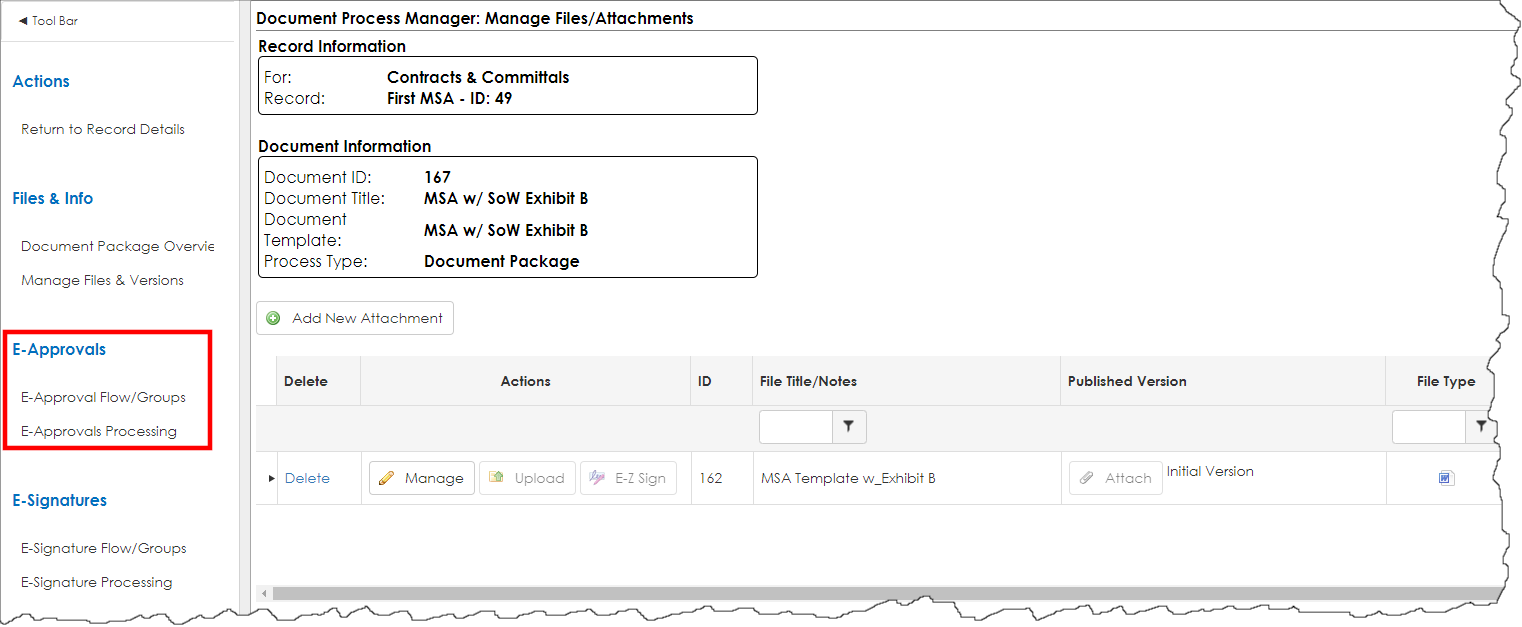
Initiating an eApproval Process
Once a template has an eApproval flow configured, the participants can be finalized and the process can be initiated from the created document package.
Confirm the E-Approval Flow/Group
1. Click E-Approval Flow/Group.
2. Click the Carat for the desired group.
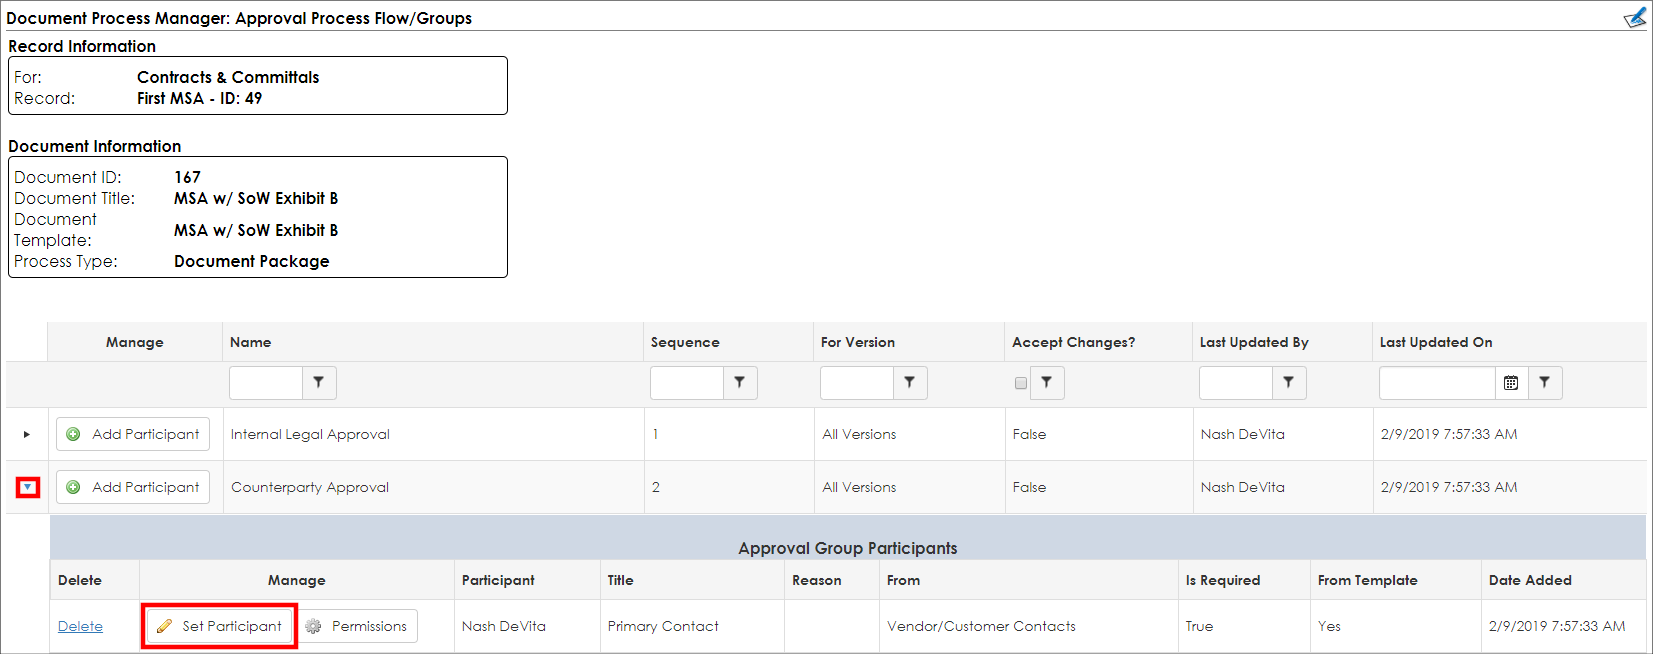
3. Click Set Participant.
4. From the Select Participant pick-list, select the desired participant.
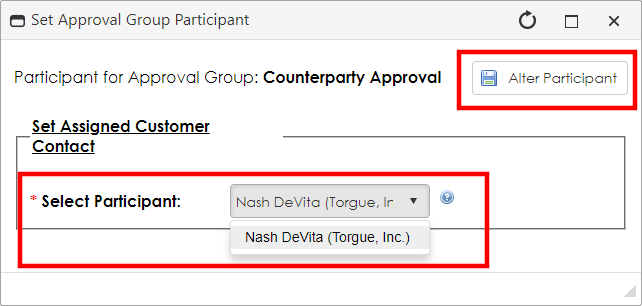
5. Click Alter Participant.
6. Repeat as necessary for other Approval Groups.
Starting the E-Approval Process
1. On the side menu, click E-Approvals Processing.
2. The Process Manager screen displays.
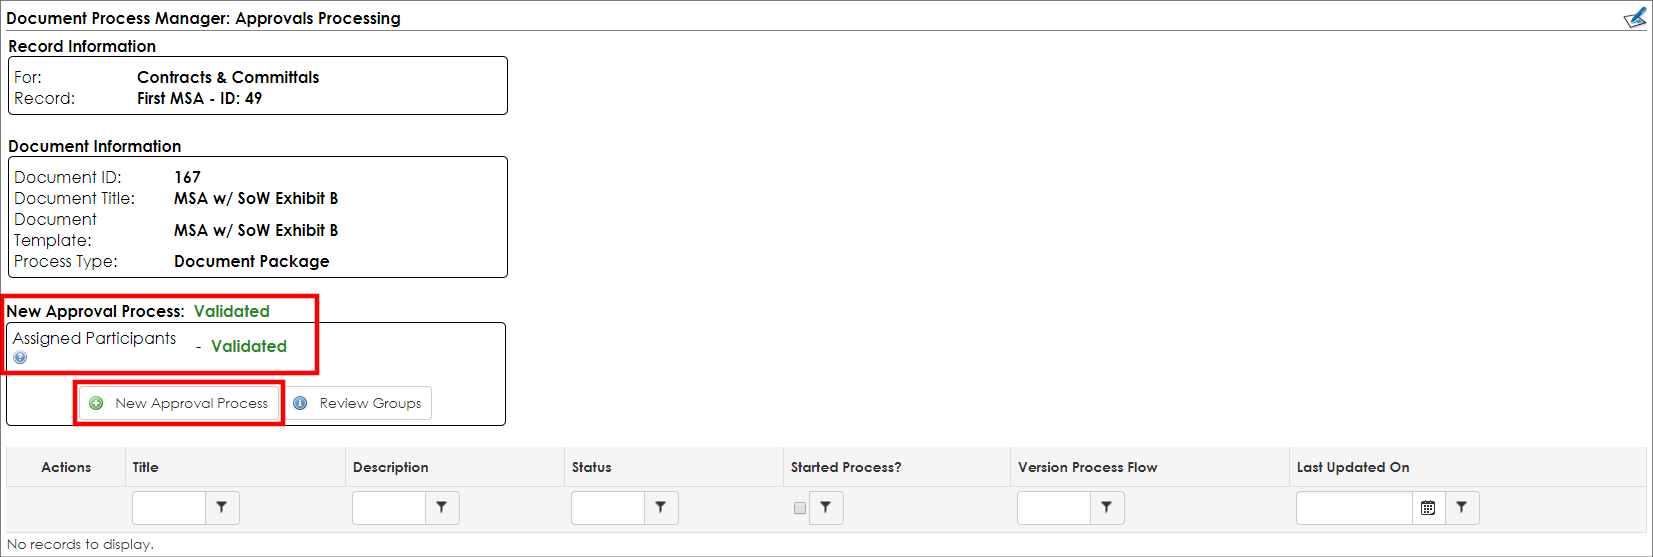
3. If all participants have been set, New Approval Process and Assigned Participants will both display as Validated. If they are not Validated, check the assigned participants.
4. Click New Approval Process.
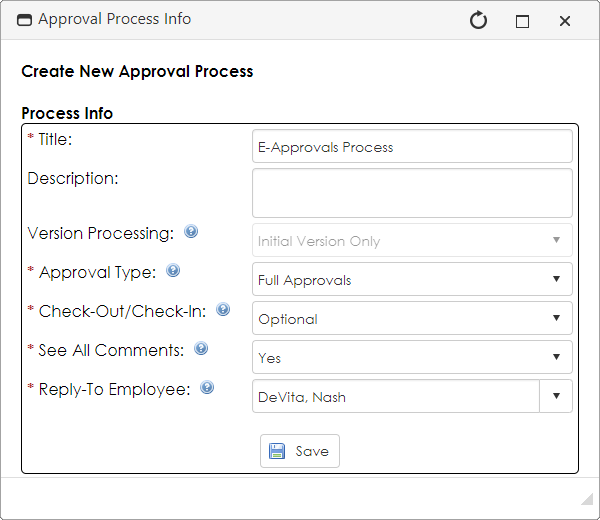
5. Set all options - paying special attention to the Approval Type.

Approval Type has two options:
Acknowledge Only: Only receipt of the document is required
Full Approvals: The document must be reviewed and then attested to for approval of the document.
|