|
Create and/or Manage Security Groups and Roles:
Log into the system as an Application Administrator.
From the Manage/Setup menu, click Manage Security Groups.
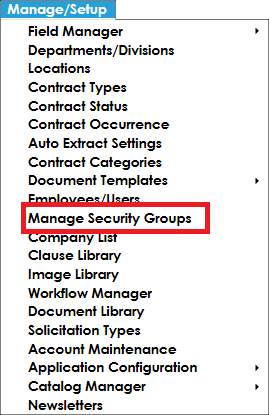
The Manage Security Groups screen displays.
To view or manage an existing Security Group, select a security group from the Manage Security Group: Select a Group drop down menu.
The Available and Assigned security roles for the selected group display.
Assigning and Removing Security Roles from a Security Group:
To assign security roles to the selected Security Group, select the Blue Left Arrow for the particular Security Role to be assigned. To remove a security role from a Security Group, select the Red Right Arrow from assigned role to be removed.

Creating a New Security Group:
To create a new Security Group, enter the new security group name in the text box on the right hand of the screen (see above). Click Save. Once created, the screen will refresh. Select the security group from the Manage Security Group: Select a Group drop down menu.
To assign security roles to the selected Security Group, select the security role/permission from the Available Security Roles area and click the Blue Left Arrow button for the particular security role to assign. To remove a security role from a Security Group, select the security role/permission from the Assigned Security Roles area and click the Red Right Arrow button from assigned role to remove.
Assigning an Employee to a Security Group
On the Managing Security Groups screen, Admin users may assign employees to a selected Security Group.
To assign employees to a security group, select the Security Group from the Manage Security Group: Select a Group drop down box. Select the employee(s) in the Unassigned Employees/Users area and click the Blue Left Arrow. To remove (un-assign) an Employee, select the employee(s) in the Assigned Employees/Users area and click the Red Right Arrow to remove (un-assign) the selected individual(s) from the Security Group
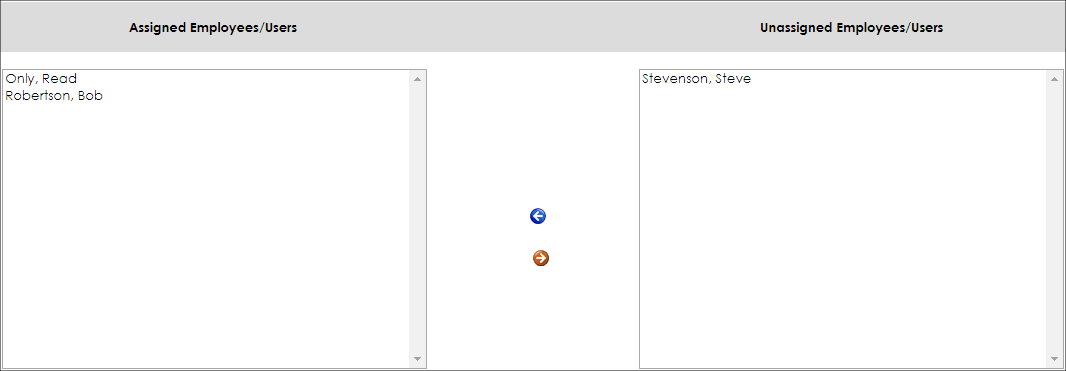
Note: If using Leveled Licenses, only the employees with a license level matching that of the security group appear in the Assigned and Unassigned Employees/Users areas.
Setting Field Restrictions
Security Groups can also manage/assign Field Restrictions for Contracts for all employees assigned to them. To assign Field Restrictions, select the field(s) from the Available Fields area and click the Blue Left Arrow to move the selected fields to the Assigned Field Restrictions area. To remove a restricted field, select the desired field(s) from the Assigned Field Restrictions and click the Red Right Arrow to move the selected field(s) to the Available Fields area.
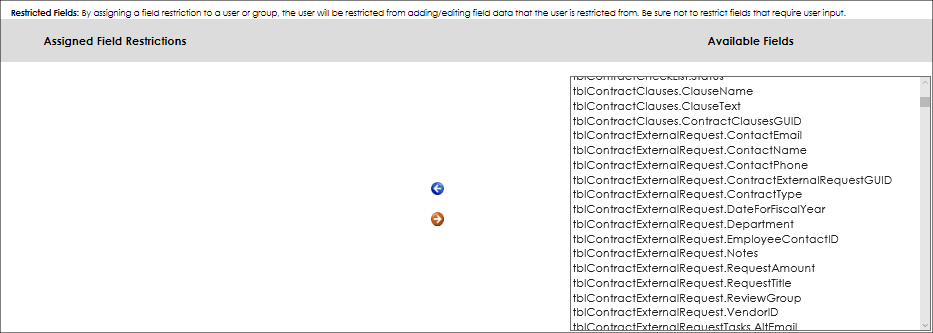
Assign Hidden Fields
Security Groups can also manage/assign Hidden Fields for records for all employees assigned to them. To assign Hidden Fields, select the field(s) from the Available Fields area and click the Blue Left Arrow to move the selected fields to the Assigned Hidden Fields area. To remove a hidden field, select the desired field(s) from the Assigned Hidden Fields and click the Red Right Arrow to move the selected field(s) to the Available Fields area.
You can also set if the field is hidden when the user is adding a new record, editing a new record, or both. To hide fields when a user is adding or editing a record, find the field in the Assigned Hidden Fields area, check the box in the Hide on Add and/or Hide on Edit column(s). To change, find the field in the Assigned Hidden Fields area and remove the check in the Hide on Add and/or Hide on Edit column(s).

Limit Reference Data Lists by Security Groups:
From the Manage/Setup menu, click Manage Security Groups.
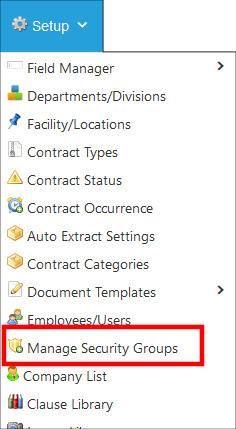
The Manage Security Group screen display.
Select a security group from the Manage Security Group: Select a Group drop down menu. Then scroll down to the Limit Reference Data table and click on the Select Reference Data button.
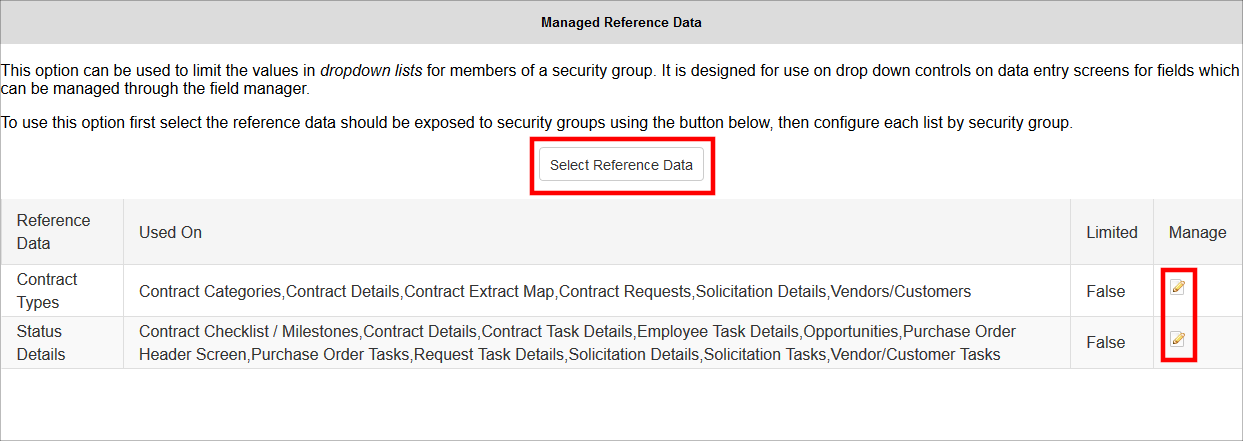
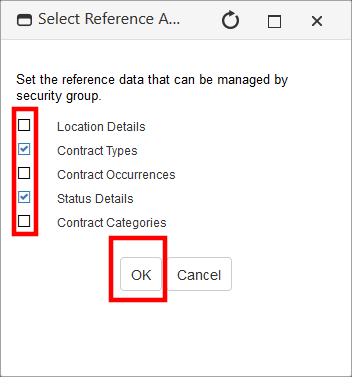
After clicking Select Reference Data a pop-up window will appear for you to select the reference area.
Click the check box of the areas you want the security group to be able to manage, the security group will not be able to manage anything left unchecked.
Once you have selected your areas you can exit out and you will see the reference data table below. You can click on the manage button on the right.
Clicking on the manage reference items button will open a pop-up window to be able to refine the selections of specific types.
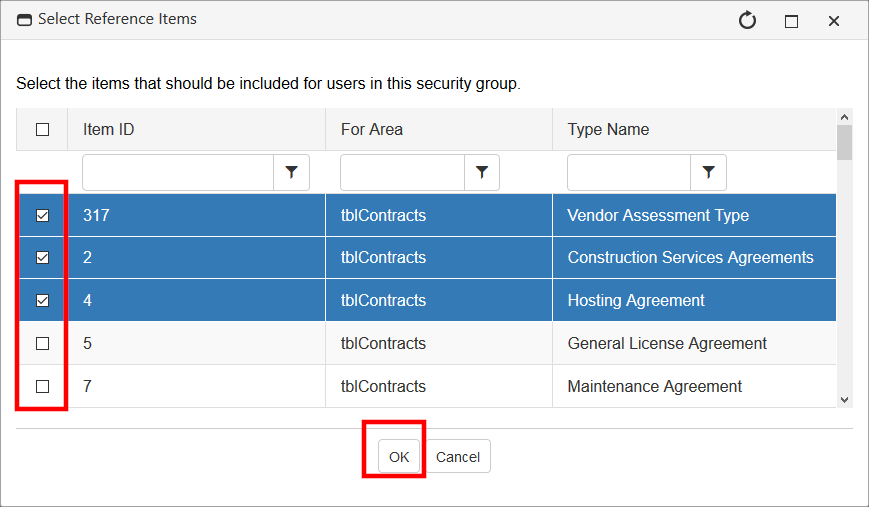
Click the check box of the types you want the security group to be able to manage, the security group will not be able to manage anything left unchecked.
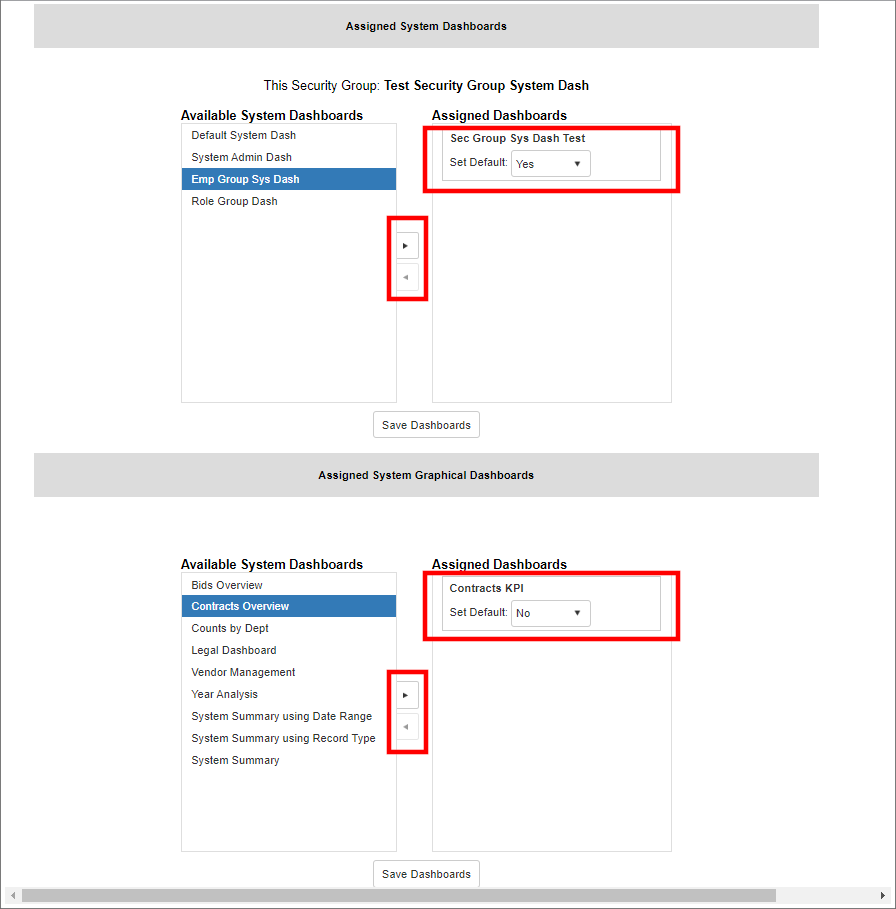
Assign System Dashboards and Graphical Dashboards by Security Group:
Security groups can be used for assignment of System Dashboards so all members of the group are assigned the dashboard.
1. Select the desired dashboard from the list on the left
2. Click the right facing arrow.
3. Select if the newly select dashboard is to be the default.
Delete a Security Group
To delete a Security Group, select the Security Group name from the Manage Security Group: Select a Group drop down menu. Click Delete This Group on the side menu (and confirm the delete).
Note: Be sure to reassign employees/users to a new security group.
|