|
Ad-Hoc Report Wizard: Field Selection
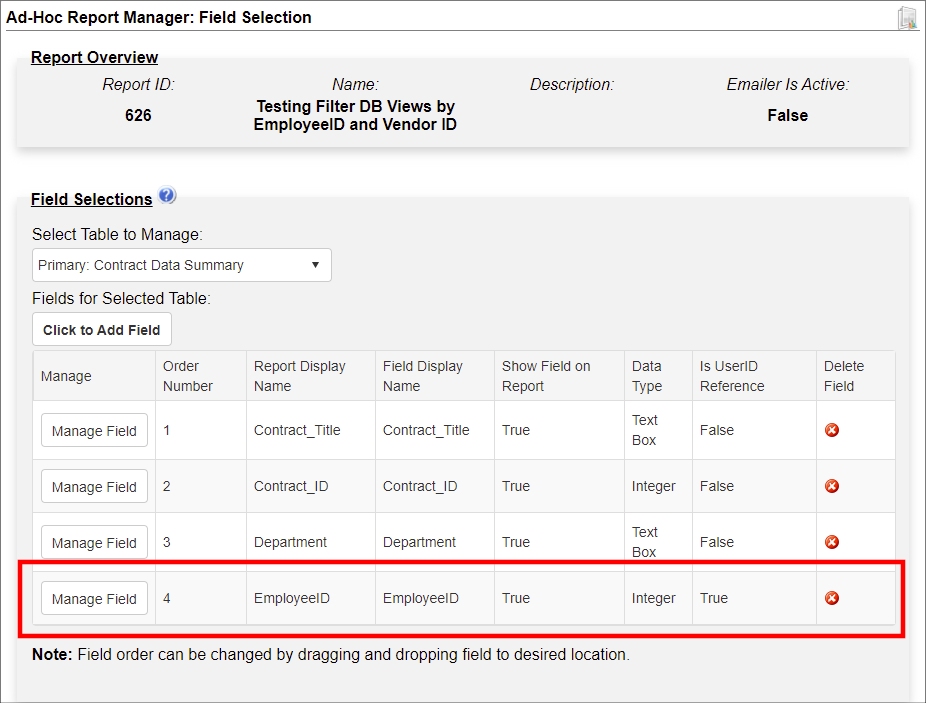
The next step in the wizard is used to specify/select what fields from the table(s) selected in step 2 are used for this report.
Selecting Fields
1. If building a new report, the Ad-Hoc Report Manager: Field Selection page displays If editing an existing report, on the side menu, Click Field Selection.
2. The Ad-Hoc Report manager: Field Selection screen displays. First select the table from which to select fields. All tables selected on the Tables screen are available. Open the Select Table to Manage pick-list and select a table. From this page, fields are assigned to the report, either to use them as column headers and/or to build a search/filter around them. Click Click to Add Field to begin adding fields to the Report.

3. A pop-up window displays. Select the field from the available pick-list. The Field Display Name is populated automatically. Edit it as necessary.

4. Mark or remove the mark for the options as necessary:
Show on Report: If checked off will cause the selected field to be displayed as a Column on the final Report. Can be unchecked to include a field in Filters/Conditions without having it be a Column.
Allow Editing of this field: If Allow Field Editing was enabled in Step 1, this will enable editing of the selected field on any Records that appear in the final Report that the User has Edit permissions for.
Add Multiple Fields: If marked, the Add Field popup window is stopped from closing after adding a field and allows multiple fields from the same table to be added back to back.
5. Click Add Field.
6. Information for fields added to the Report is displayed as each field is added. Click Manage Field to adjust settings for each.
7. Select a new table and repeat for fields on other tables.
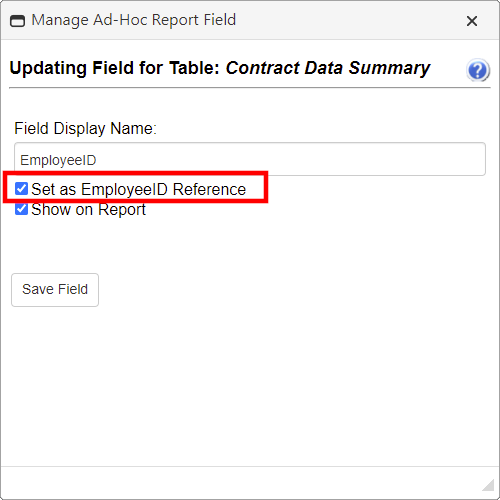
Note: If working with a DB View as a parent "table", Mark Set as Reference for VendorID name or EmployeeID to apply a filter and only show records assigned to that counterparty or employee as applicable.


|