|
Solicitations: Rating & Scoring Respondents
Once the solicitation closes, the assigned group/employee(s) should review the respondents’ responses and assign a rating for each area of the scorecard.
Rating/Scoring a Respondent
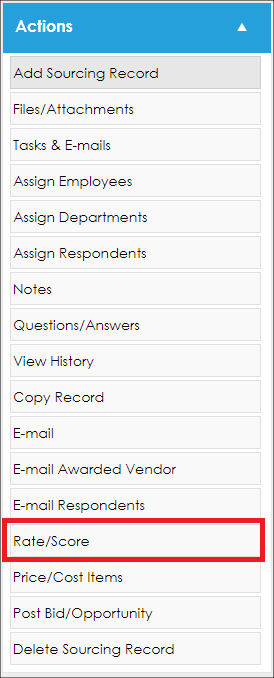
1. To access the Rating & Scorecard section of the solicitation record, click Rate/Score on the side menu of the Solicitation Details screen. Alternatively, navigate to the Rating and Scoring section by scrolling down the Solicitation Details screen. Both methods go to the same section.

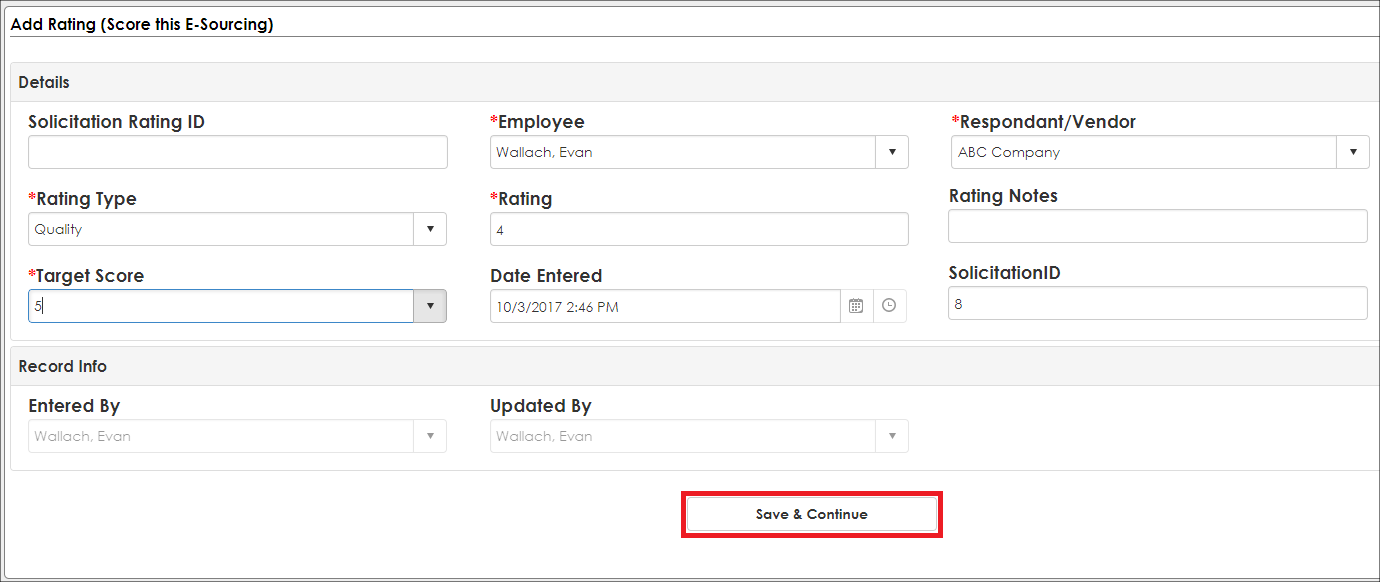
2. Click Add Rate/Score to add a respondent rating to open the Add Rating (Score this E-Sourcing) screen on which respondent rating is entered.

3. Enter all necessary information into the scorecard. Be sure to populate all required fields (marked by a red asterisk).

4. The grayed-out fields are read-only and will be automatically populated upon clicking Save & Continue.
5. The Rating Type is a user-definable field that can be edited by navigating to Manage/Setup - Manage Fields – Field Manager. Only authorized/licensed users may access to and capability to manage items within the Field Manager.
6. Once all necessary/required information has been entered, click Save & Continue to save the new rating. Click Return to Sourcing Details button on the side menu to cancel the new rating. Both options return the user to the Solicitation Details screen.
7. After adding the new rating, the Rating and Scoring section of the solicitation record displays the new scorecard results. As each Rating Type is completed and saved, the vendor’s score is averaged.
8. Filter the scoring/rating card by entering a keyword(s) and clicking the filter icons  for each corresponding column. for each corresponding column.

Editing a Rating/Scorecard
1. To edit the scorecard, click Edit for the line item for which changes are to be made.
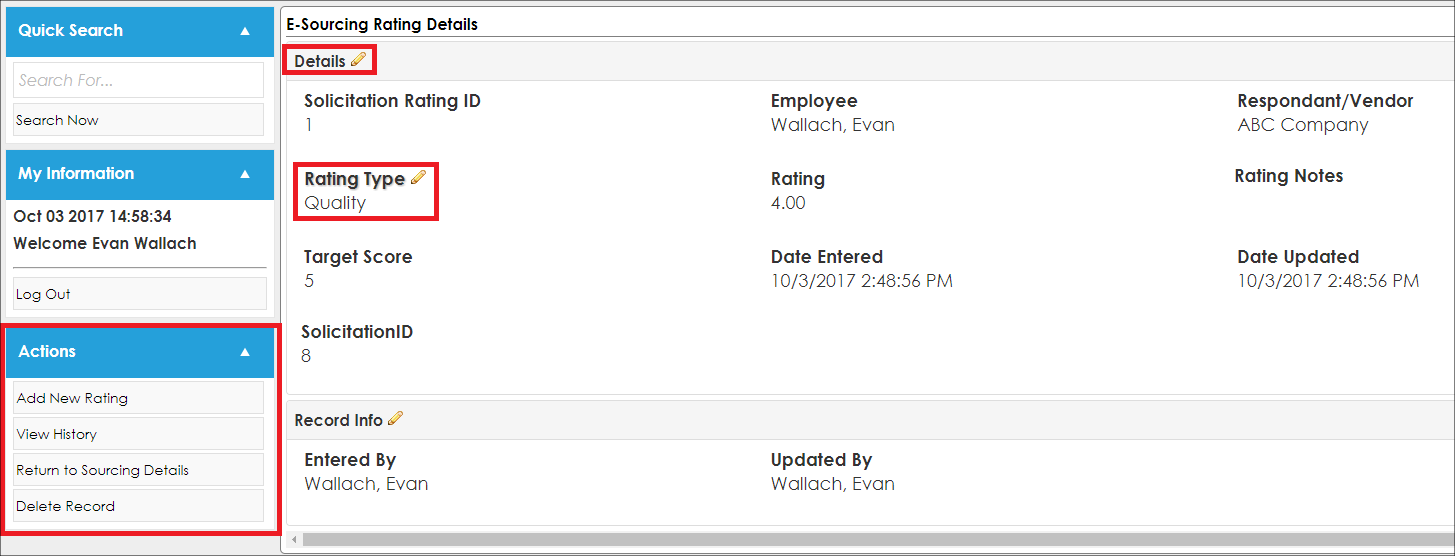
2. The E-Sourcing Rating Details screen on which users edit line items, print the screen, view the history of the scorecard, delete the scorecard record, or add a new rating displays.

3. Click the pencil icon  for the field to edit to open the Edit Field screen. for the field to edit to open the Edit Field screen.
Note: click the pencil icon for the entire field group to edit multiple fields at once, such as next to Details in the above screenshot.
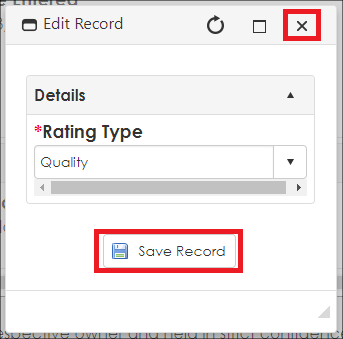
4. Once the desired change has been made, click Save Record.

5. Cancel the change made by clicking the X in the upper-right corner.
|