|
AppConfig: External E-Sign Setup
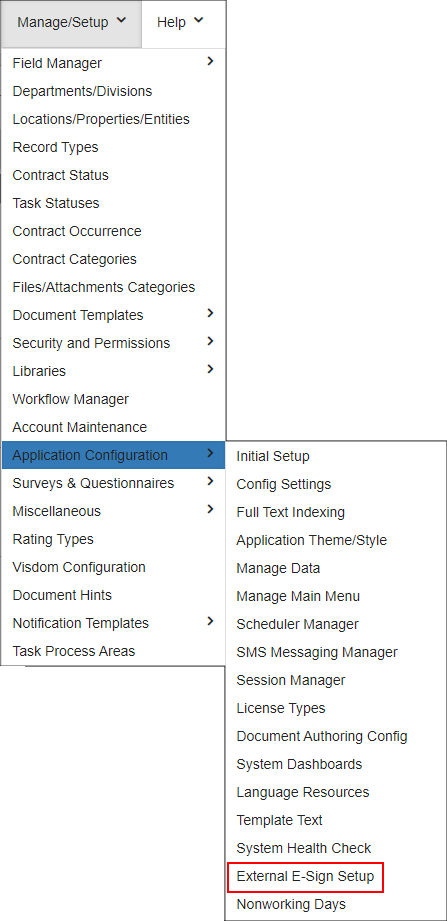
If the DocuSign Integration module has been licensed, use the External E-Sign Setup page to set it up. To reach it, navigate to Manage/Setup > Application Configuration > External E-Sign Setup.
Click Edit Login on the DocuSign Connection Settings module to enter the credentials and GUID for the DocuSign Admin’s account. The credentials and GUID entered here must to be for a DocuSign Admin; otherwise, the integration will not work. Select or enter the appropriate URL, and choose whether or not to allow Send On Behalf Of.
Click Edit Settings on the Contract Insight Processing Settings module to adjust the Import Timer, as well as the Email Subject and Body texts.
The DocuSign Logged In User Account Settings and the DocuSign Users in this Account areas populate automatically and cannot be adjusted through the User Interface. If there are no Users in the DocuSign Users in this Account section, there was an issue with the DocuSign Admin credentials previously entered.
Testing DocuSign in Contract Insight
- Log in to Contract Insight as user with permissions to Add, Edit and View Contract Records.
- In the top menu bar, use the Quick Search to search for the word test (or, if there is data in the system, another contract name you are familiar with).
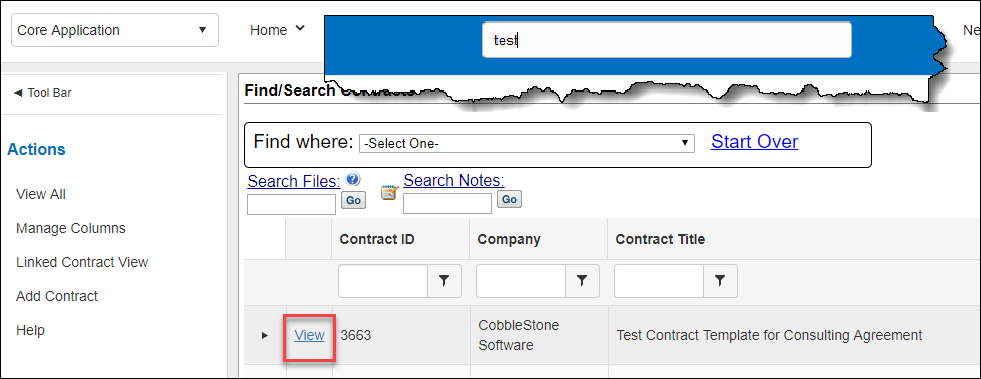
- Once the search results populate, select View to view an existing Contract Record Details page.
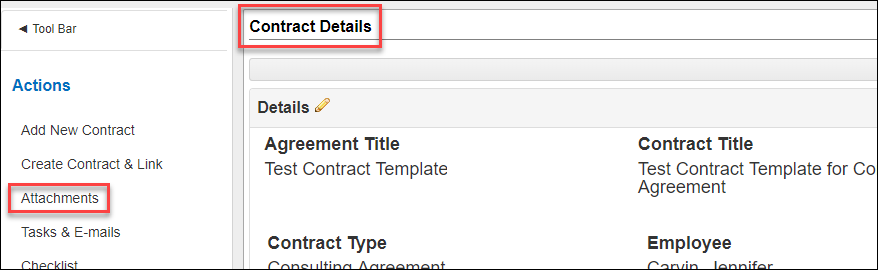
- From the Contract Details page, select Attachments in the side menu.
- At the top of the Files/Attachments section, click the Browse button and select a PDF or Word file to upload for signature from the pop up file browser.
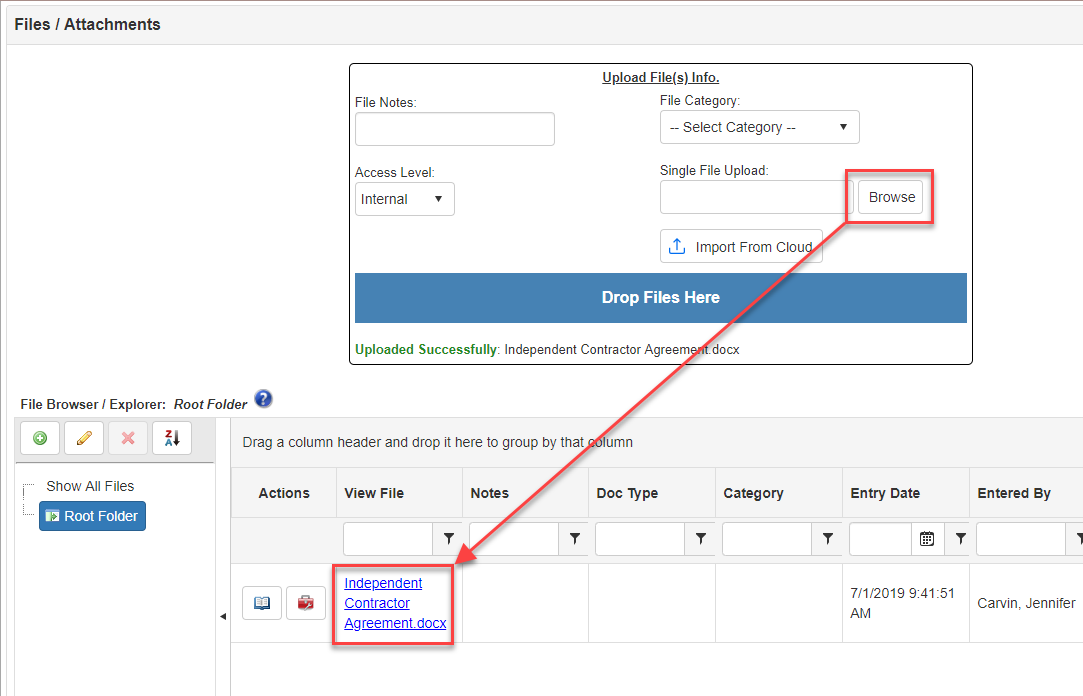
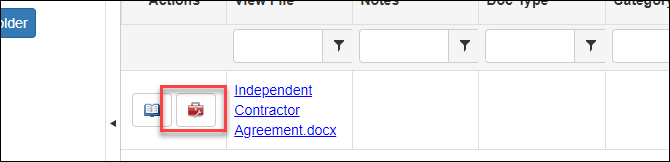
- After the file is uploaded it will display in the files section (as seen above).
- Click the red toolbox icon next to the file to be signed via DocuSign.
- The option Esign Document is available in the Document Toolbox pop-up window.
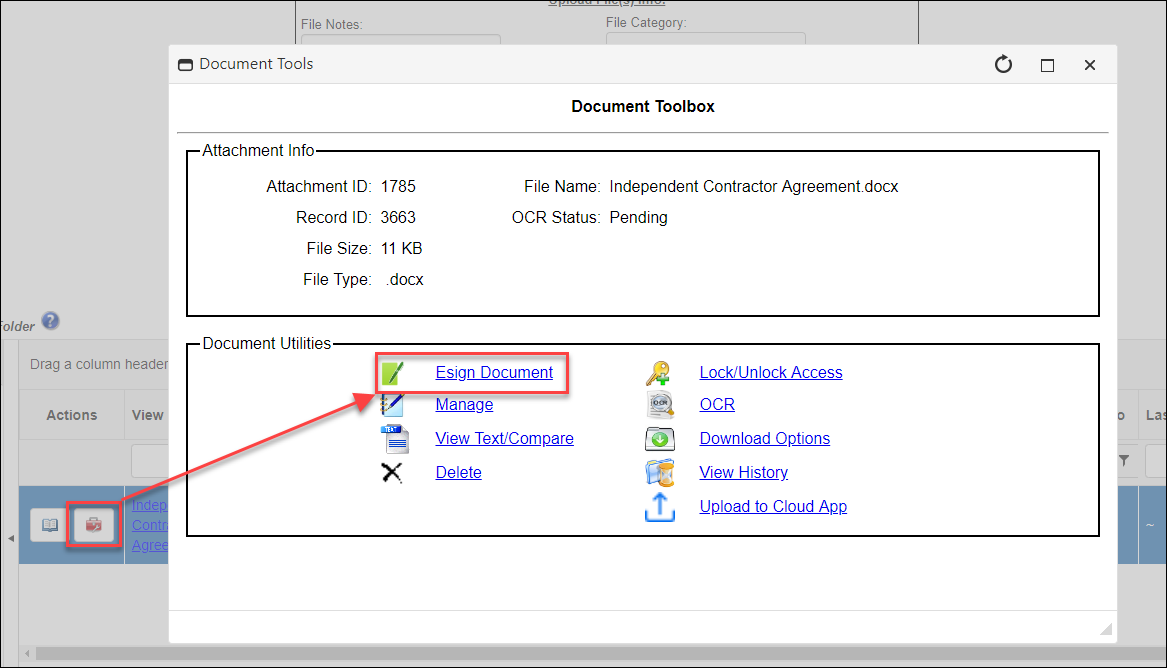
- Click the DocuSign image button to proceed.
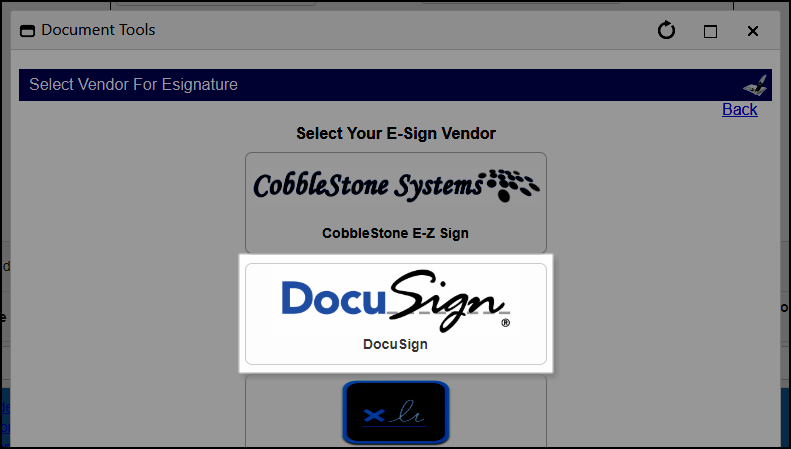
Note: An option for Adobe Sign [if licensed] and/or DocuSign [if licensed] or CobbleStone IntelliSign [if licensed] shows here.
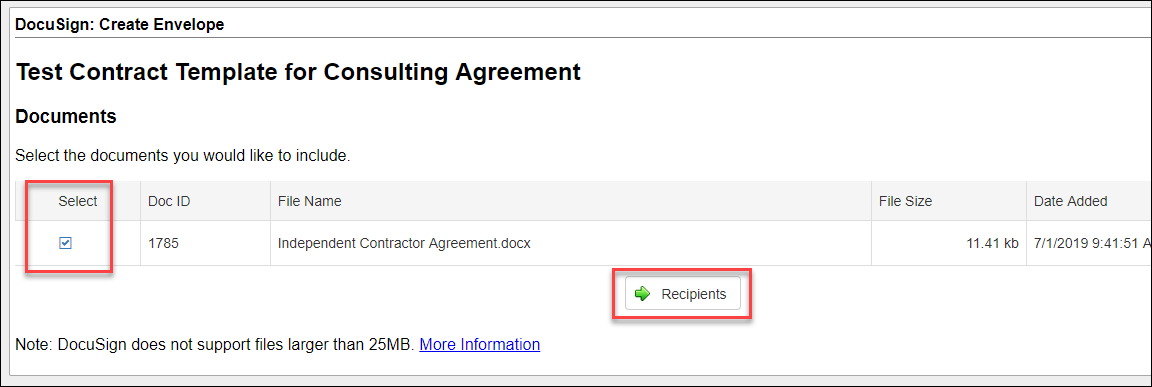
- Next, a pop-up window on which the option to select from among all files associated with the record displays. Select a file to be sent to DocuSign for signature then click the Recipients button to continue.
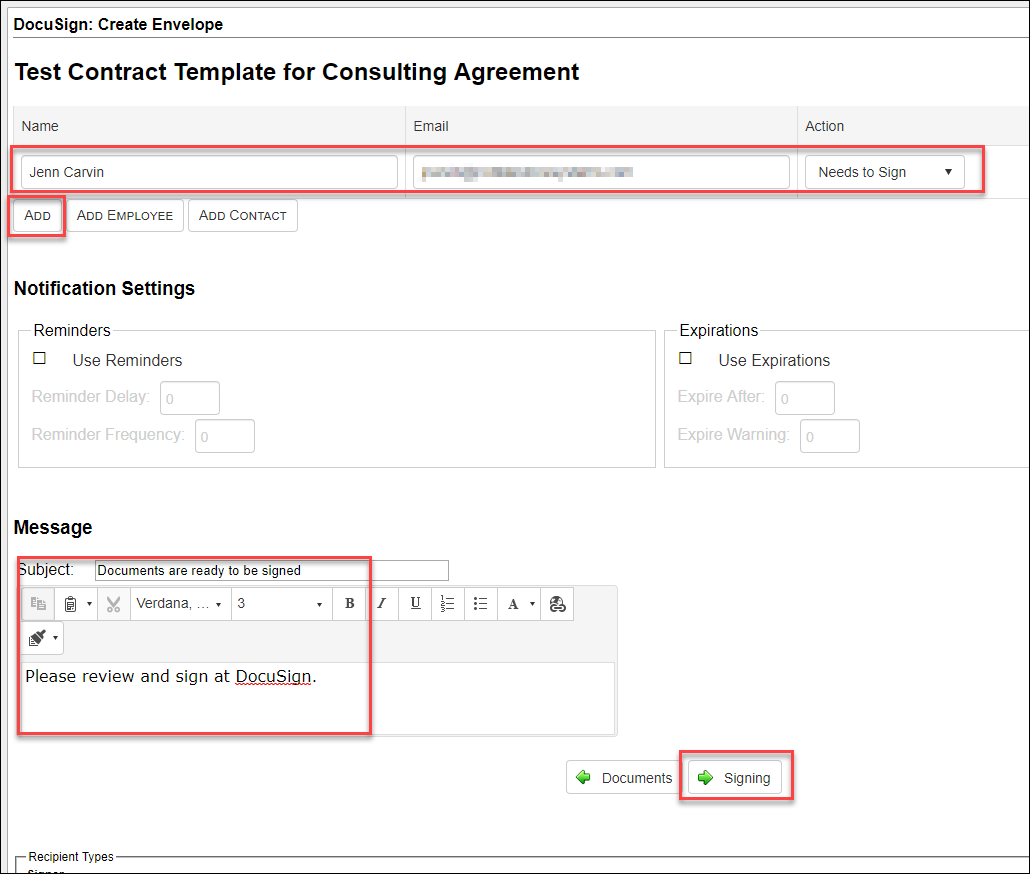
- On the DocuSign: Create Envelope page, enter in the Signer/Recipient Name, Email, select an Action from the dropdown, then click the ADD button. Repeat for each person to be included in the DocuSign process.
- Update the optional Notification Settings if needed.
- Review and update the Message Settings.
- When complete, click on the Signing button.
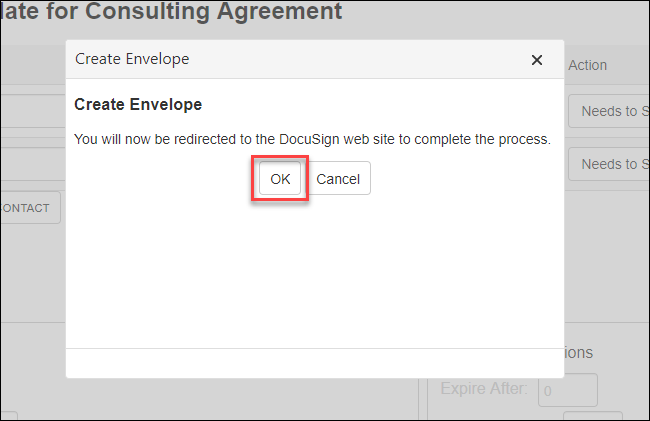
- In the pop-up screen, click OK to be taken to the DocuSign website to finish the process.
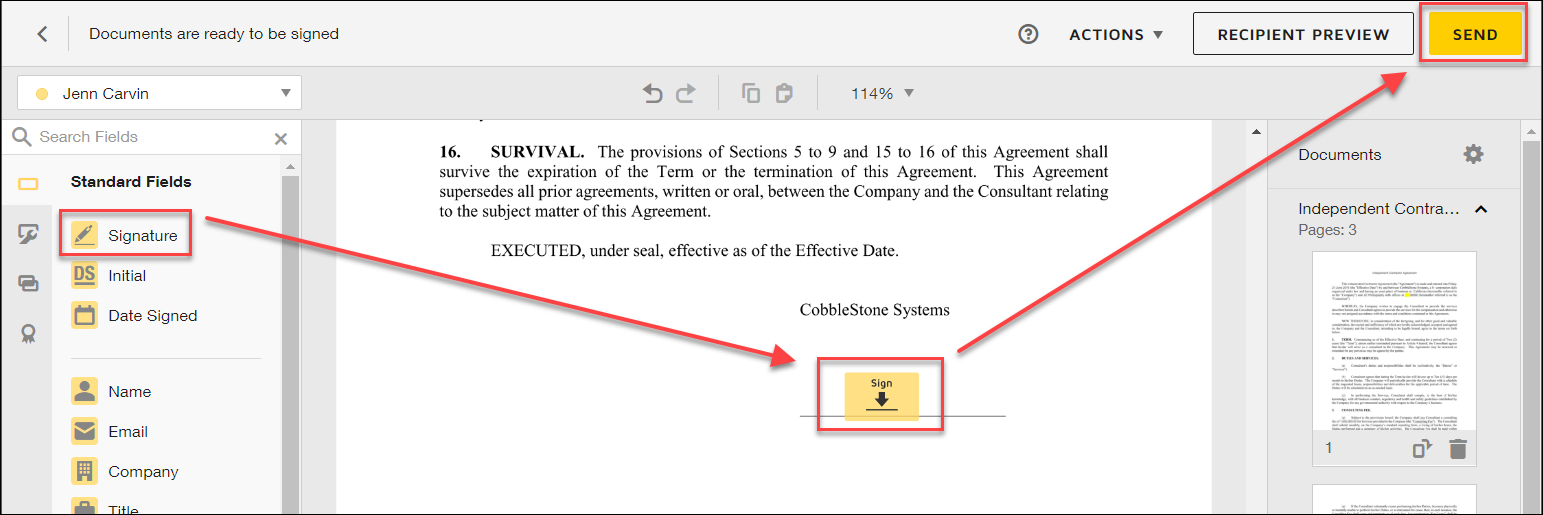
- [Outside of Cobblestone Software] On the DocuSign screen, set Signature placeholders [optional] and then select the Send button for DocuSign to route the signing process.
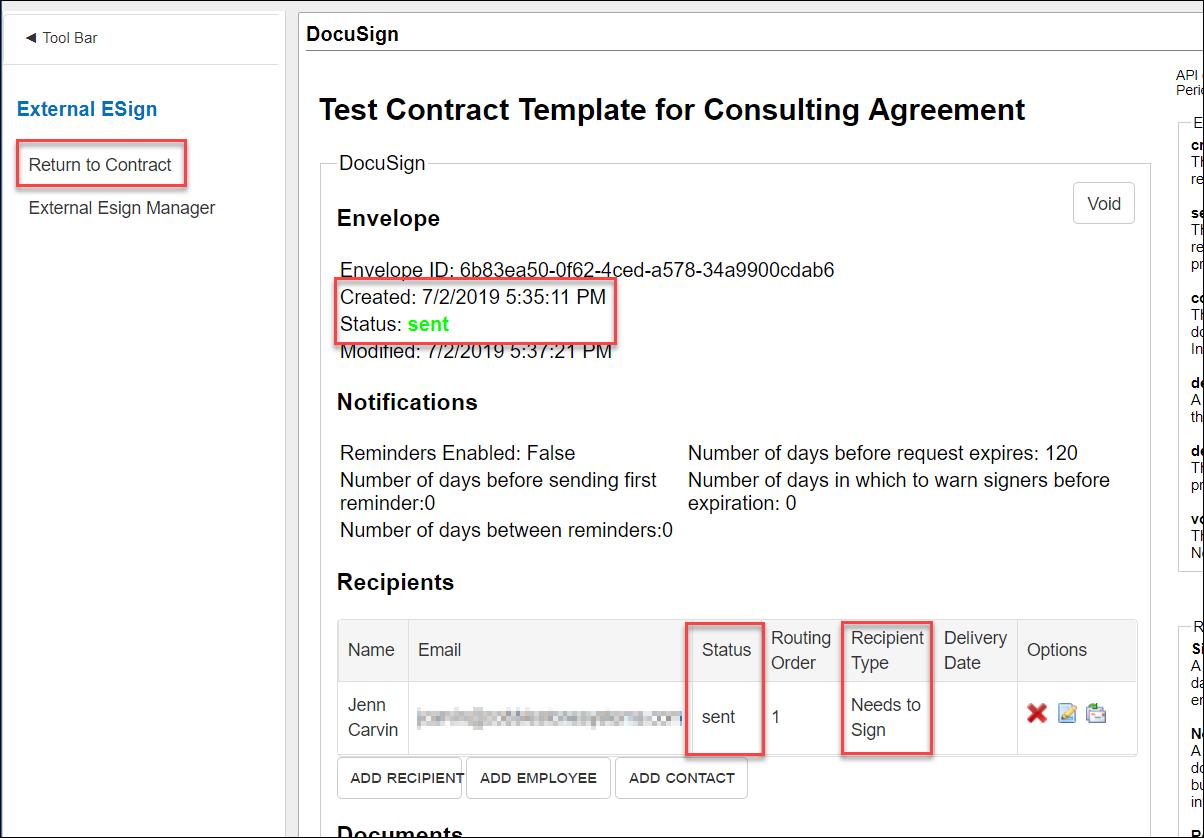
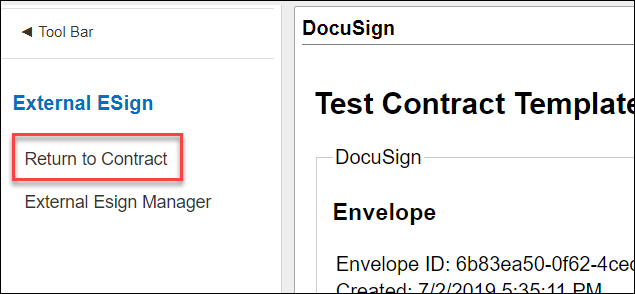
- The screen will automatically refresh and return to the DocuSign Envelope page within Contract Insight. This page shows the status of the Envelope that was sent and the status of the signature process. Select Return to Contract in the side menu to be taken back to the Contract Details Record.
- [Outside of Cobblestone Software] The signer(s) will receive an email from DocuSign to complete the signing process. Be sure to click Finish after signing.
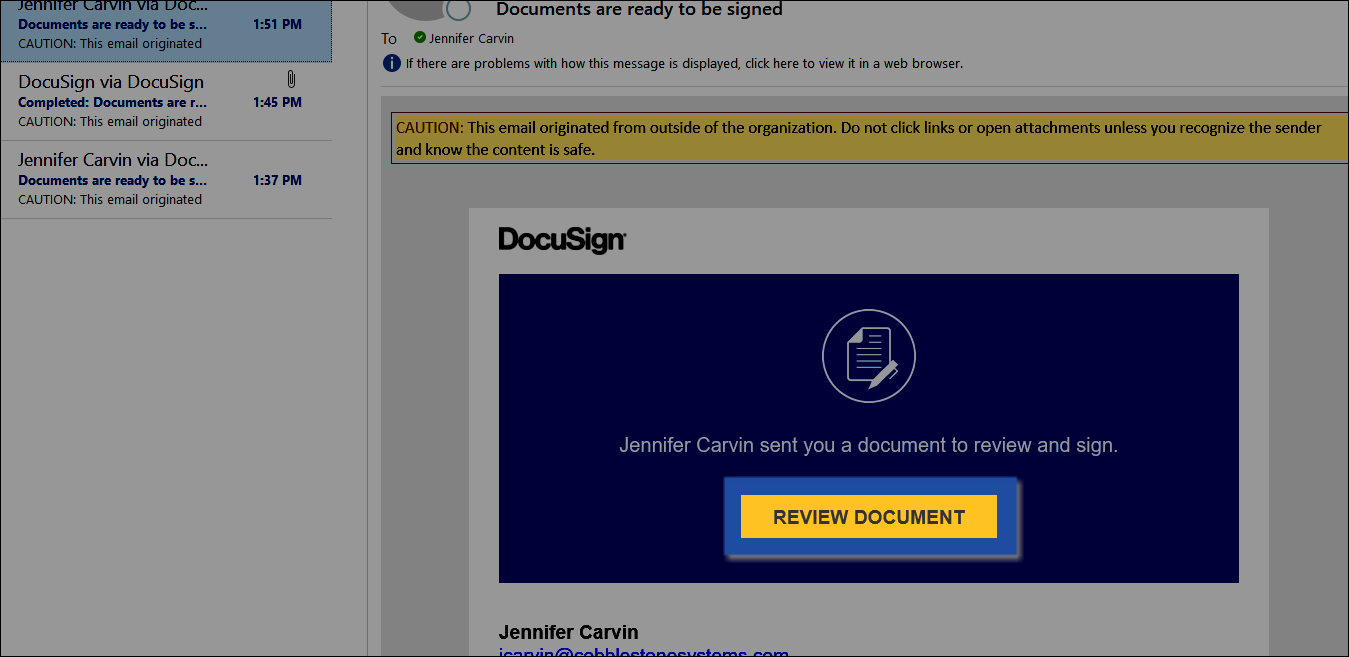
Note: Emails may go to a user’s Clutter or Junk folder, be sure to routinely check if the DocuSign email was routed to your junk email folder

-
Contract Insight will routinely check DocuSign for a status of the signatures. Once all required signatures have been acquired, Contract Insight will pull the signed document and add it to the Files/Attachments section of the Contract Record.
Check the status of the signature process
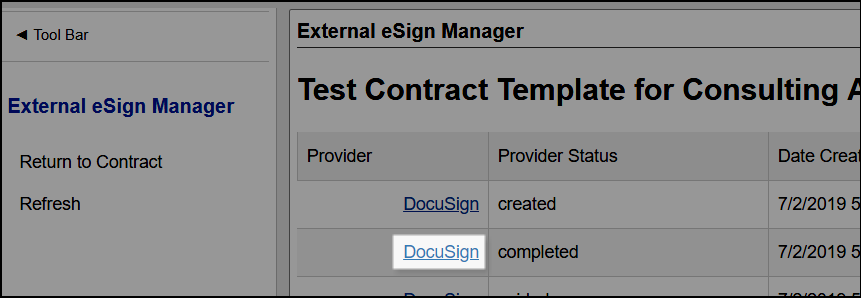
- Return to the Contract Record and select External Esign Manager from the side menu.

- Select the DocuSign link to view the status for that signature process.
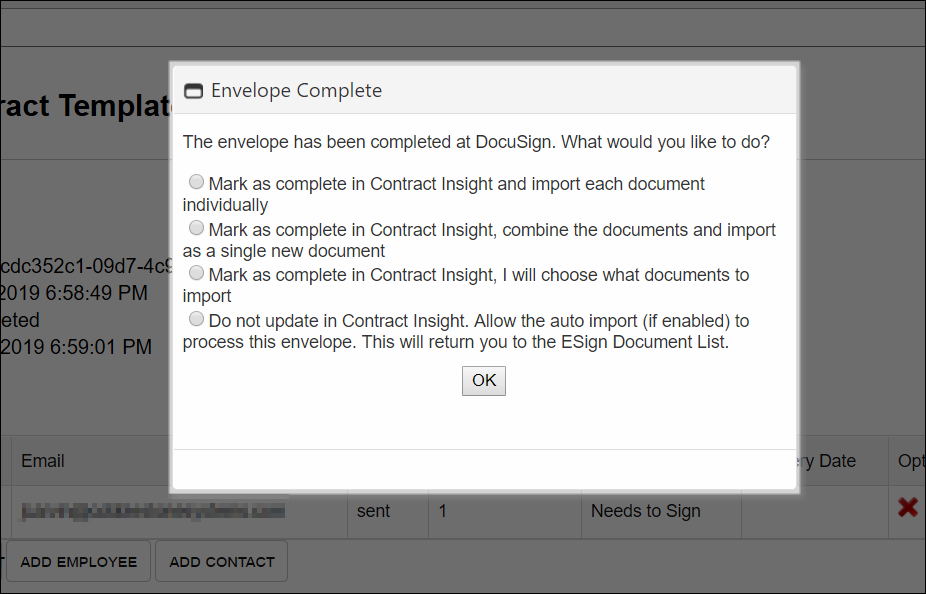
- If all signatures have been acquired, Contract Insight will ask how to handle the signed document(s). Choose an option and select OK.
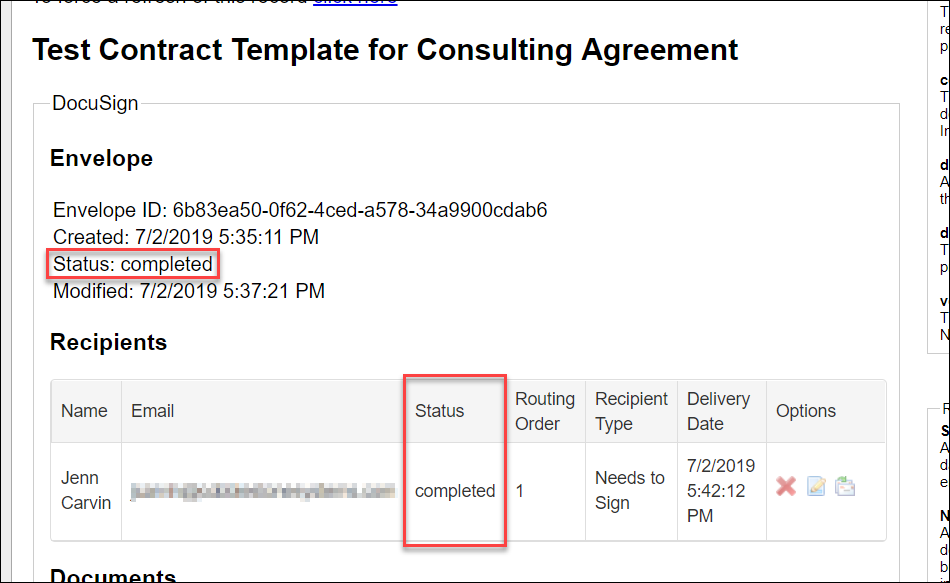
- When complete, the Contract Insight signature monitoring page will show the process as complete.
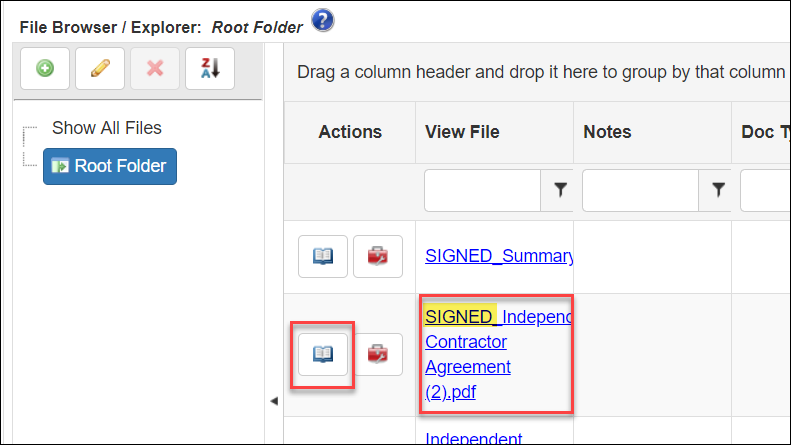
- To view the signed document(s), click Return to Contract in the side menu.
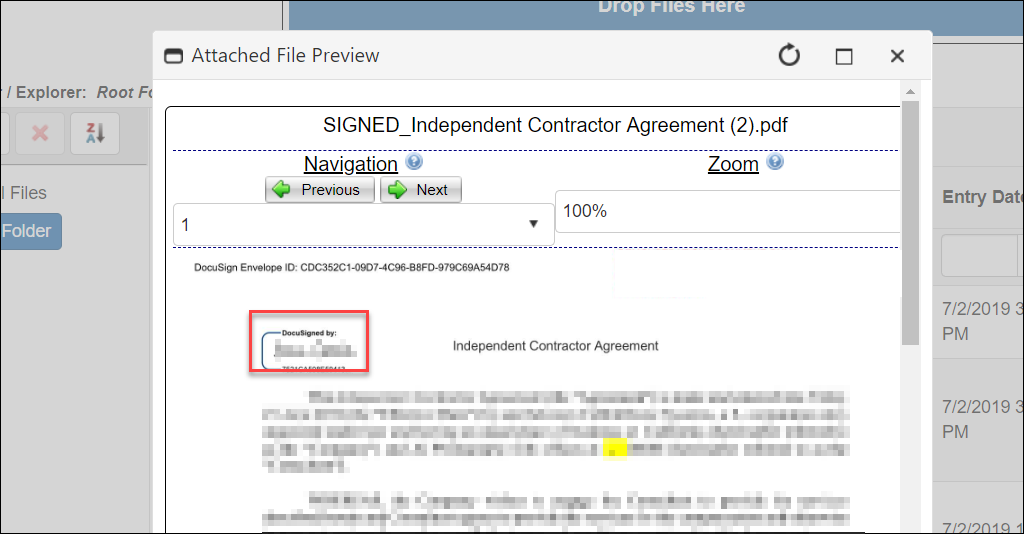
- Scroll down to the Files/Attachments section on the Contract Record to find the latest file(s) attached. To preview a file, click on the Preview File/Attachment icon.
Expected Testing Results
- The document was sent to DocuSign for signing.
- The Contract Insight signature monitoring page shows the DocuSign process as Complete once all parties have signed.
- The signed document has been attached to the Contract Record.
Note: “Checks” between Contract Insight and DocuSign are run on a schedule. Please wait up to 20 minutes after all parties have signed to verify process is complete and up to 30 minutes for the final document to be attached to the Contract Record.
|