|
Employee/User Management: Employee Roles & Groups
Contract Insight supports the ability to create, manage, and assign employees/users to Application Administrator-defined roles/groups. This allows Application Administrators to assign tasks (and workflows) to not only an individual employee/user, but also custom groups.
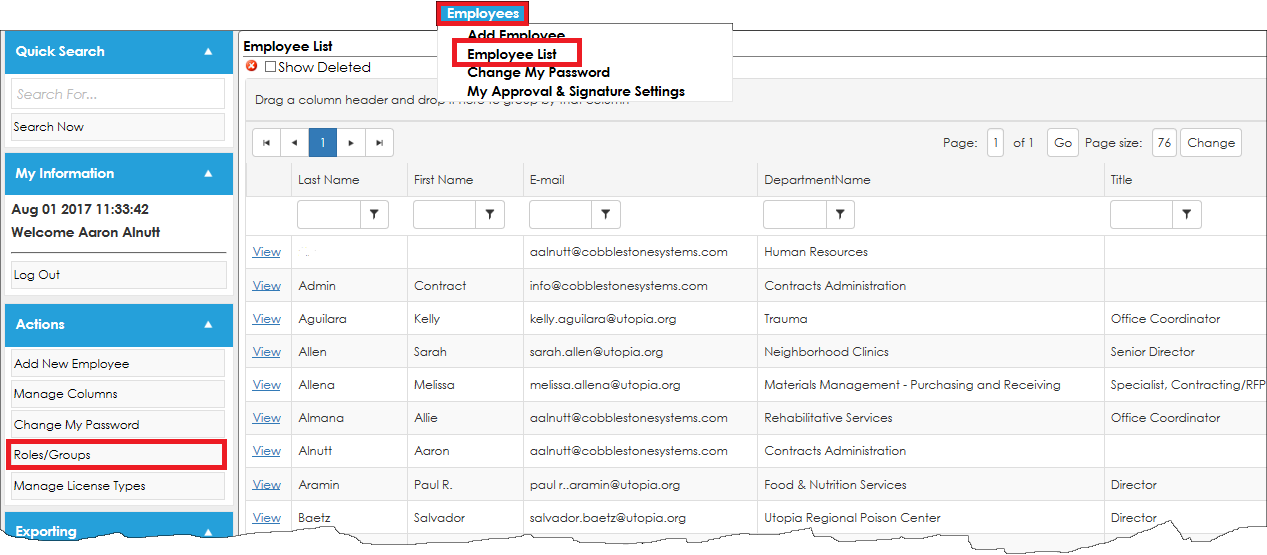
1. Log into the system as an Application Administrator, and navigate to Employees > Employee List.

2. Click Roles/Groups on the side menu.
3. The Employee Role/Group List screen displays. Click Add Role/Group on the side menu.

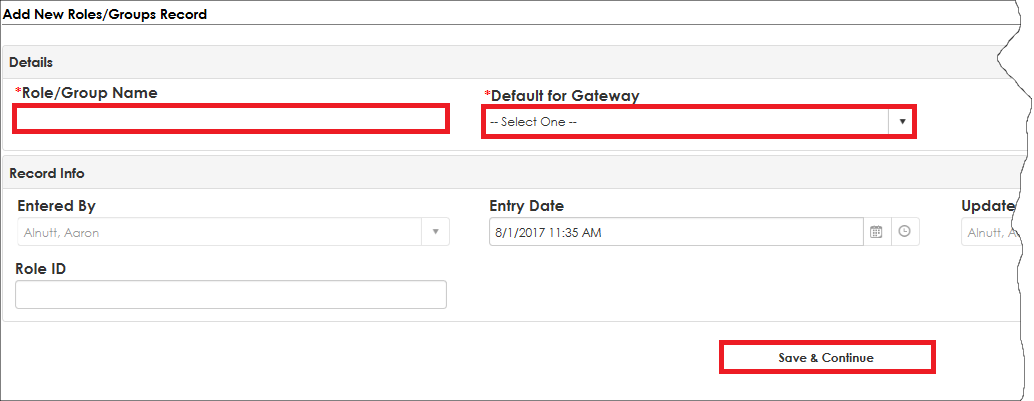
5. Enter the Name for the Role/Group to create.
6.
Select whether the new Role/Group should be the group notified for Contract Requests submitted on the Vendor/Client Gateway by selecting Yes or No for the Default for Gateway field.
7. Click Save.

Note: The Default for Gateway field must be set to Yes for at least one Employee Group if you would like to allow Vendors/Clients to submit Contract Requests through the Gateway (see the Managing Access to the Gateway Wiki page for information about setting Configuration Settings to allow Vendors/Customers to submit Contract Requests through the Vendor/Client Gateway).
Navigate to the Employee Group/Role List screen. Click View for the group line item.

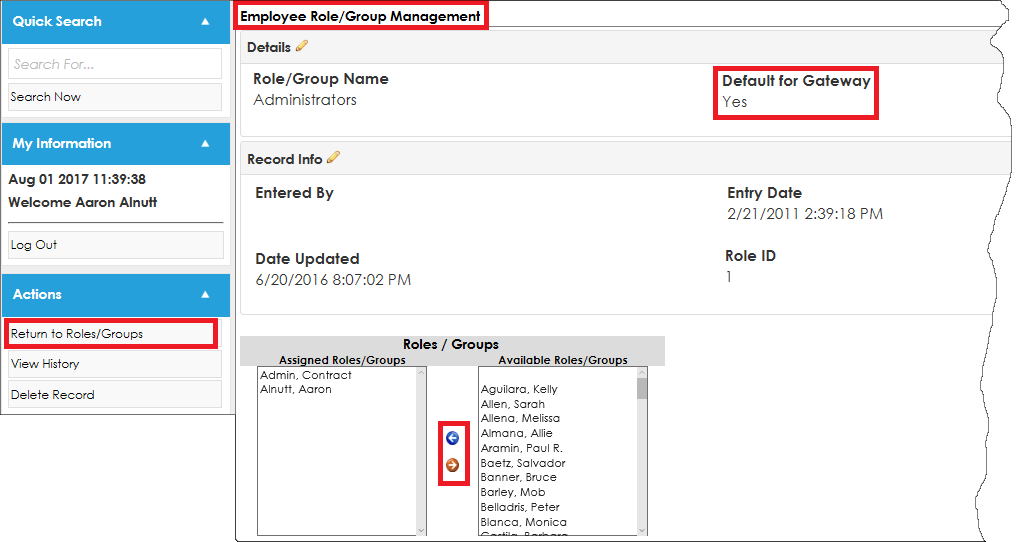
3. The Employee Role/Group Management Screen displays. Select the Employee name(s) from the Available Roles/Groups area and click the Blue Left Arrow. Repeat this process to assign multiple users to the group. To remove employees, select the employee name(s) from the Assigned Roles/Groups area and click the Red Right Arrow.
4. To return to the prior screen, click Back to Roles/Groups on the side menu.

Delete an Employee Group
1. Navigate to the Employee Role/Group Management Screen.
2. Click Delete Record on the side menu.
|