|
Vendor/Client Gateway: Managing Fields Displayed for Contracts & Committals
Contract Insight allows system administrators and users with the appropriate permissions to manage the fields that are displayed on the Vendor/Client on the Gateway from the Contract Details screen.
To access the Manage Gateway Fields screen
1.Navigate to Manage/Setup - Account Maintenance.

2. On the menu under Actions, click Manage Gateway Fields.

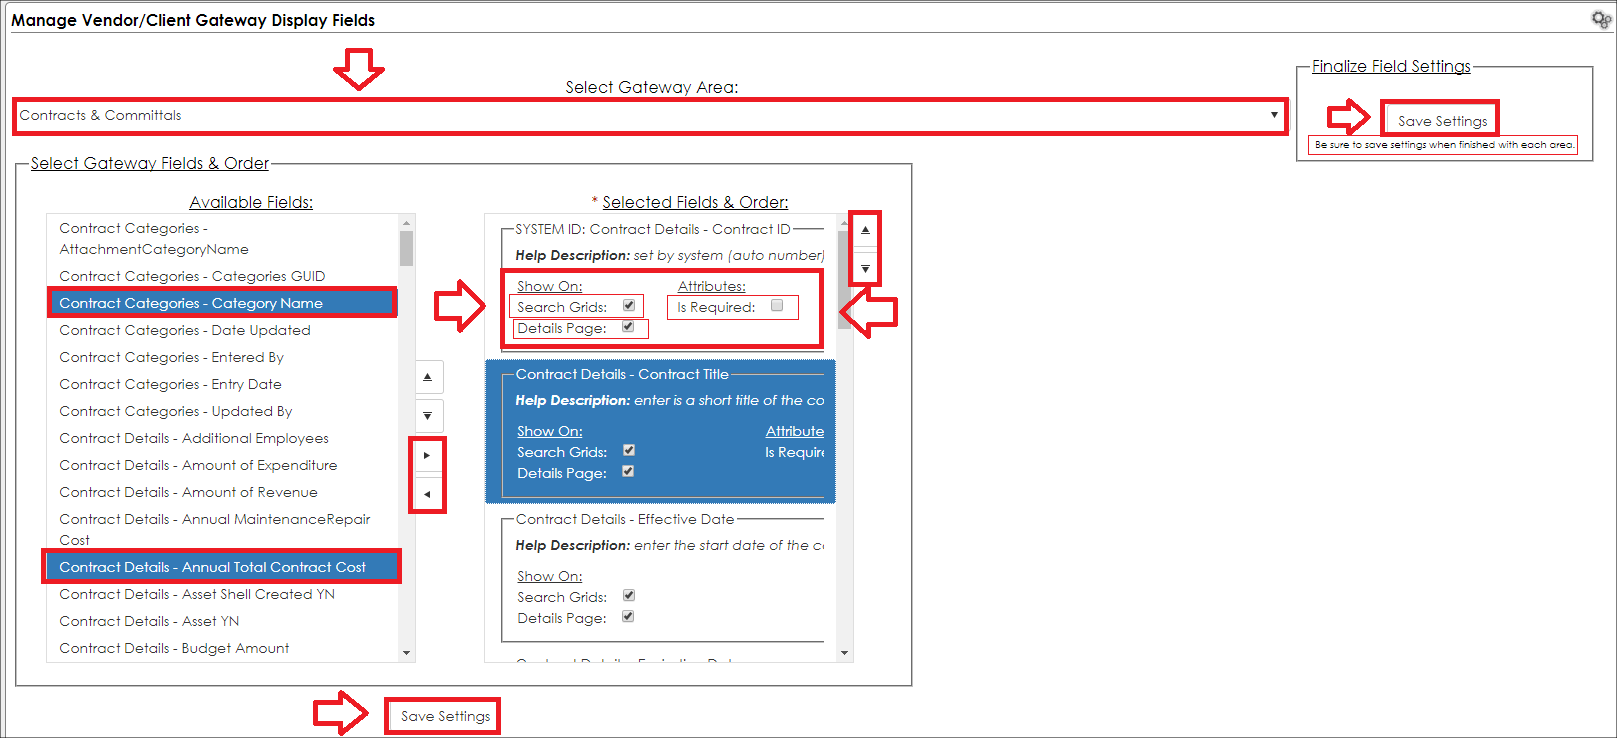
3. The Manage Vendor/Client Gateway Display Fields screen displays. It displays fields that have been selected to be displayed on the gateway, as well as additional fields that are available to be displayed.
4. On the Select Gateway Area drop-down menu, select the Contracts & Committals area to manage the fields on the Contract Details screen to be displayed on the Gateway.

5. In the Available Fields list, the fields highlighted in dark teal-blue have already been added to the Selected Fields & Order list. When a field is added to the Selected Fields & Order list, select the Gateway screens for which the field display.
Show On:
If selected, the field will be displayed on the page checked:
- Search Grids
- Details Page
Note: The Attributes: Is Required field does not need to be selected because Vendors/Clients cannot add Contracts on the Gateway; ignore the field.
6. To add a field from the Available Fields list, highlight the field and either click, drag, and drop the field to the proper position in the Selected Fields & Order list or click the Right Arrow to move the field to the bottom of the Selected Fields & Order list.
7. To change the order in which the fields displayed on the Gateway, select the field to move in the Selected Fields & Order list and either click the up and down arrows (to the right of the list) or click, drag, and drop the field in the desired field order.
8. Once the fields to display have been selected and ordered and all necessary Show On boxes have been marked, click Save Settings.
|